For the complete documentation index, see llms.txt. Prefer markdown by appending.mdto documentation URLs or sendingAccept: text/markdown.
Edge Add-ons
Submit your Chromium extension to Microsoft Edge Add-ons. Reuse most Chrome assets with Edge-specific packaging and review steps.
Microsoft Edge Add-ons distributes extensions to Microsoft Edge users. If you already have a Chromium-based extension, you can submit it to Edge with minimal changes.
This guide walks you through manual submission and optional automation, aligned with the official process.
Prerequisite
Make sure your extension follows the general guidelines and the Edge Add-ons developer policies to increase your chances of approval.
Developer account
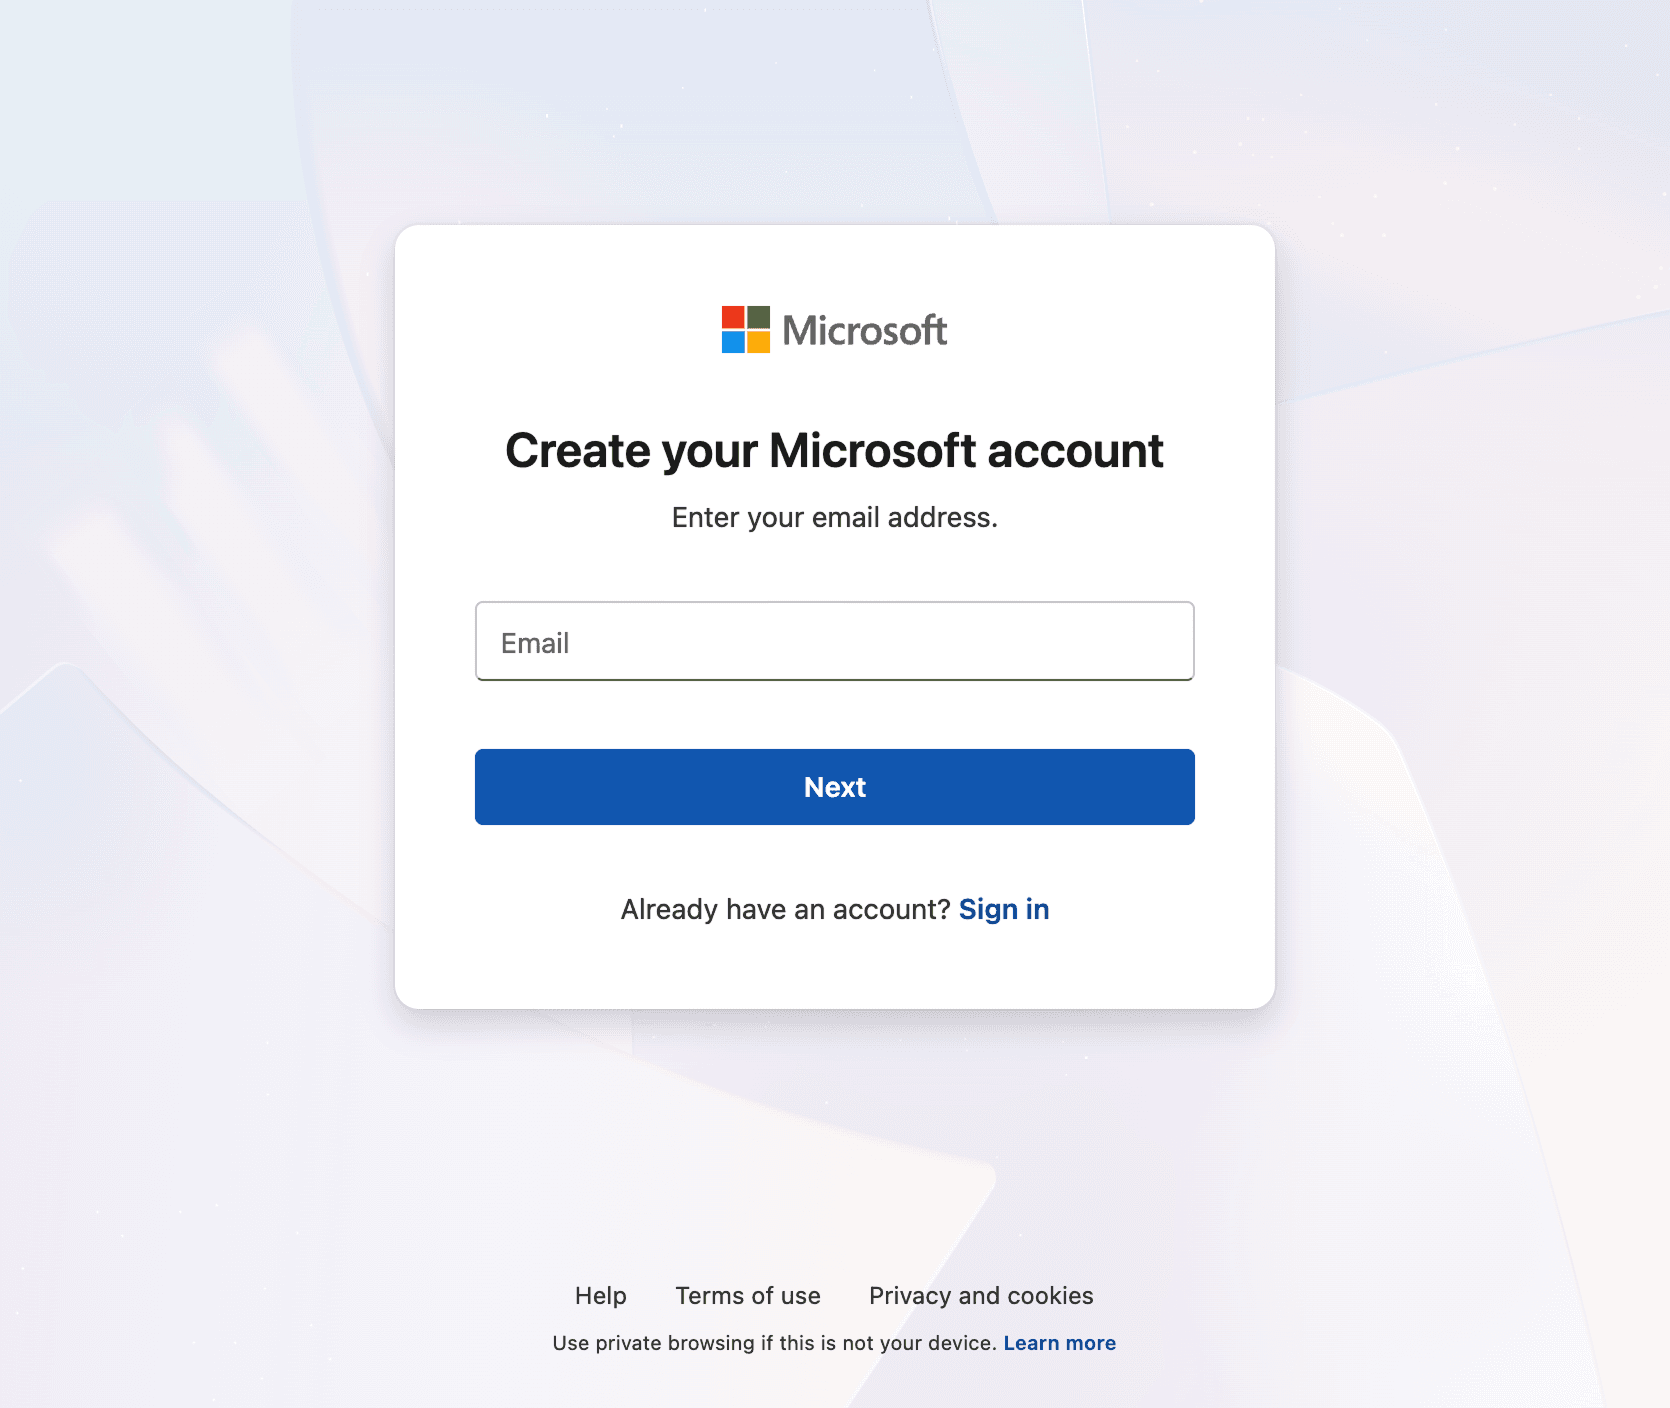
To enroll in the Microsoft Edge program you need to have a Microsoft account. If you don't have one, you can create one here.
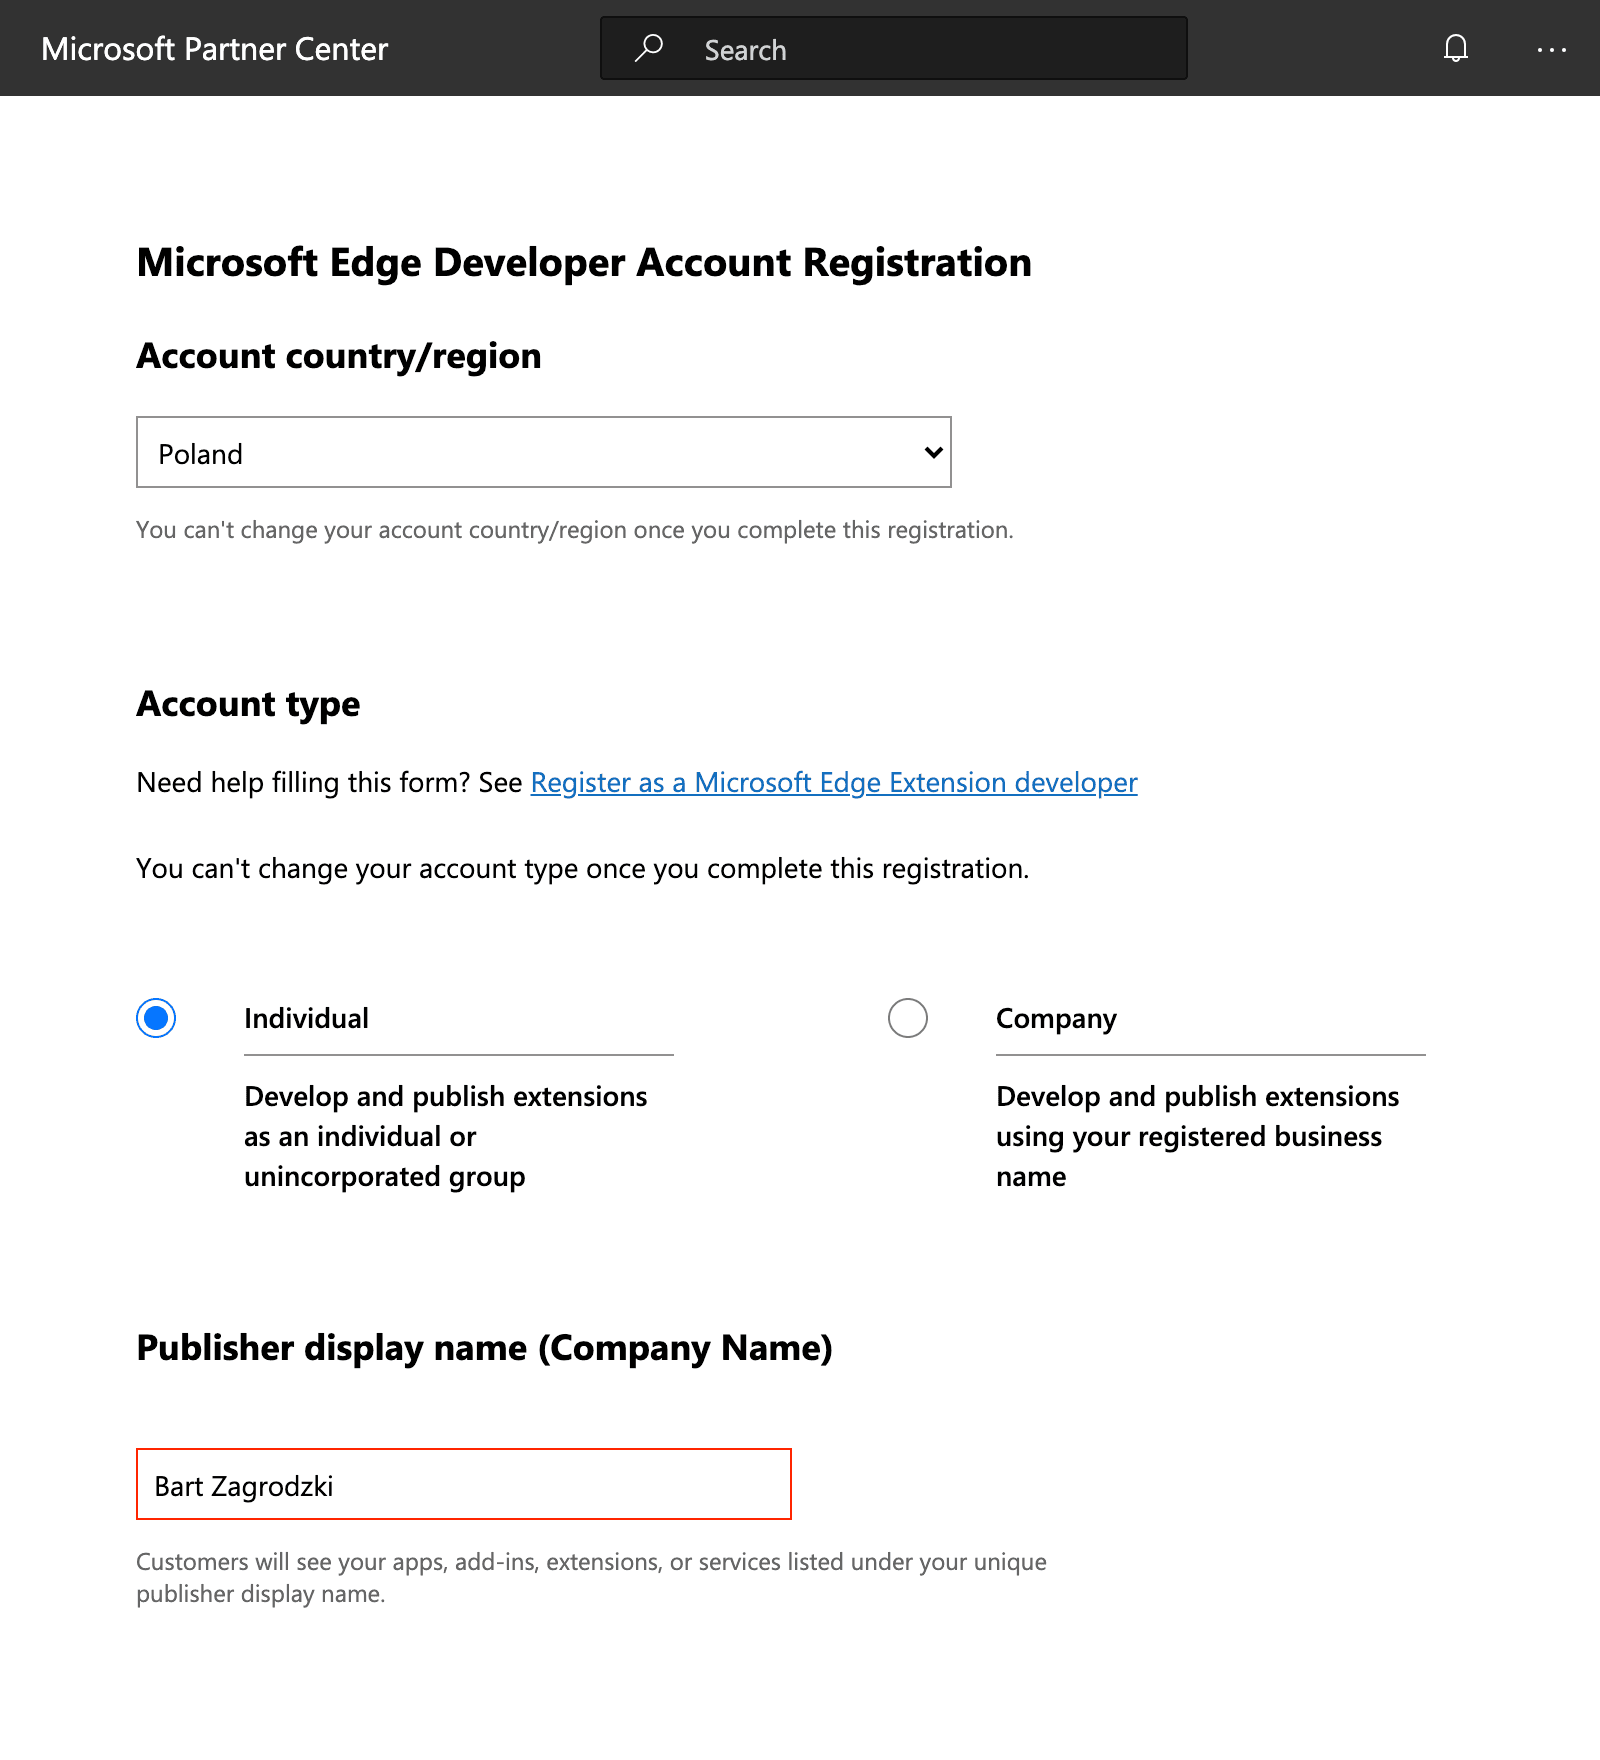
Next, before you can publish your extension to Edge Add-ons, you need to register your developer account in Partner Center. Fill out the required fields and submit the form with Finish button. Wait for the email that your account has been verified - you're ready to submit your extension!
Register as a Microsoft Edge extension developer
learn.microsoft.com
Submission
After your account is ready and the extension bundle is prepared, you can publish it. There are two paths:
- Manually: Upload your
.zippackage through Partner Center. - Automatically: Use CI to upload new versions after the first manual submission.
The first submission should be done manually. Subsequent updates can be automated once you have your extension ID and required credentials.
Manual submission
To manually submit your extension to stores, you will first need to get your extension bundle. If you ran the build step locally, you should already have the .zip file in your extension's build folder.
If you used GitHub Actions to build your extension, you can find the results in the workflow run. Download the artifacts and save them on your local machine.
Then, use the following steps to upload your item:
Sign in to your developer account
Go to the Partner Center and sign in to your developer account.
Upload the extension package
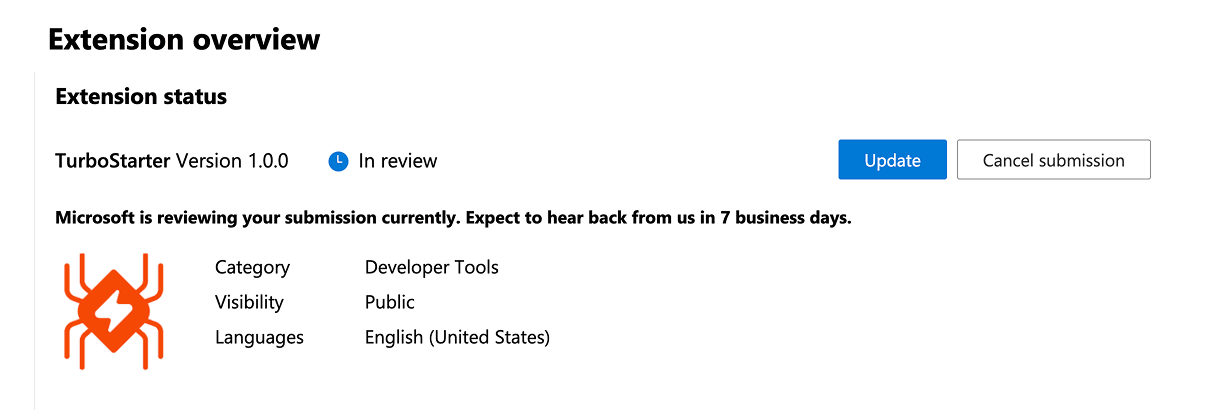
The Extension overview page shows information for a specific extension:
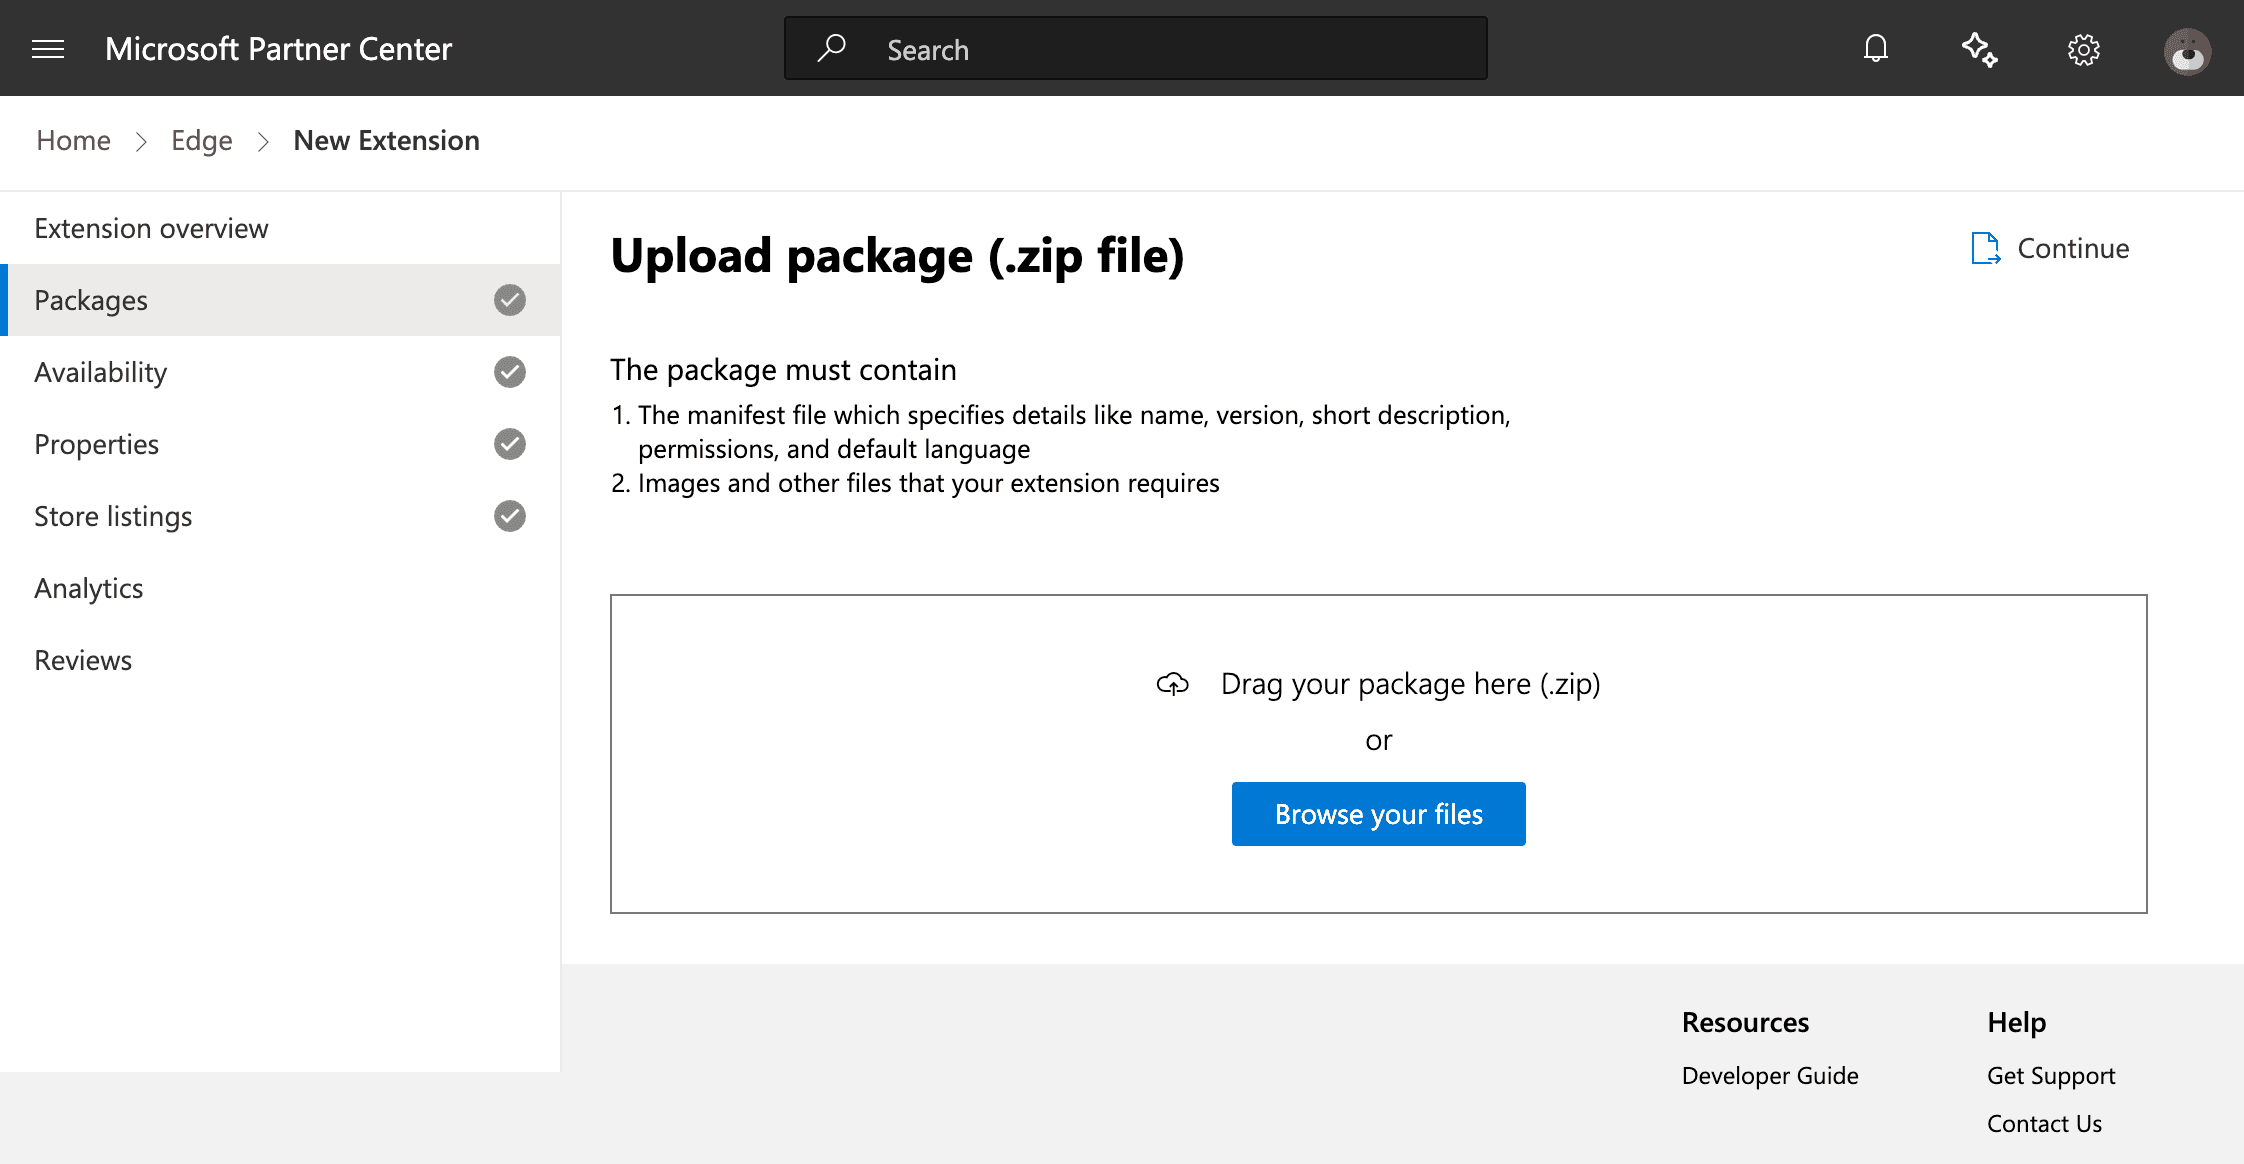
To upload your extension package:
- Click Packages in the left sidebar.
- Drag and drop your
.zipfile or click Browse your files to select it. - Wait for validation to complete. If it fails, fix any issues and re-upload.
- Review the extracted extension details and click Continue.
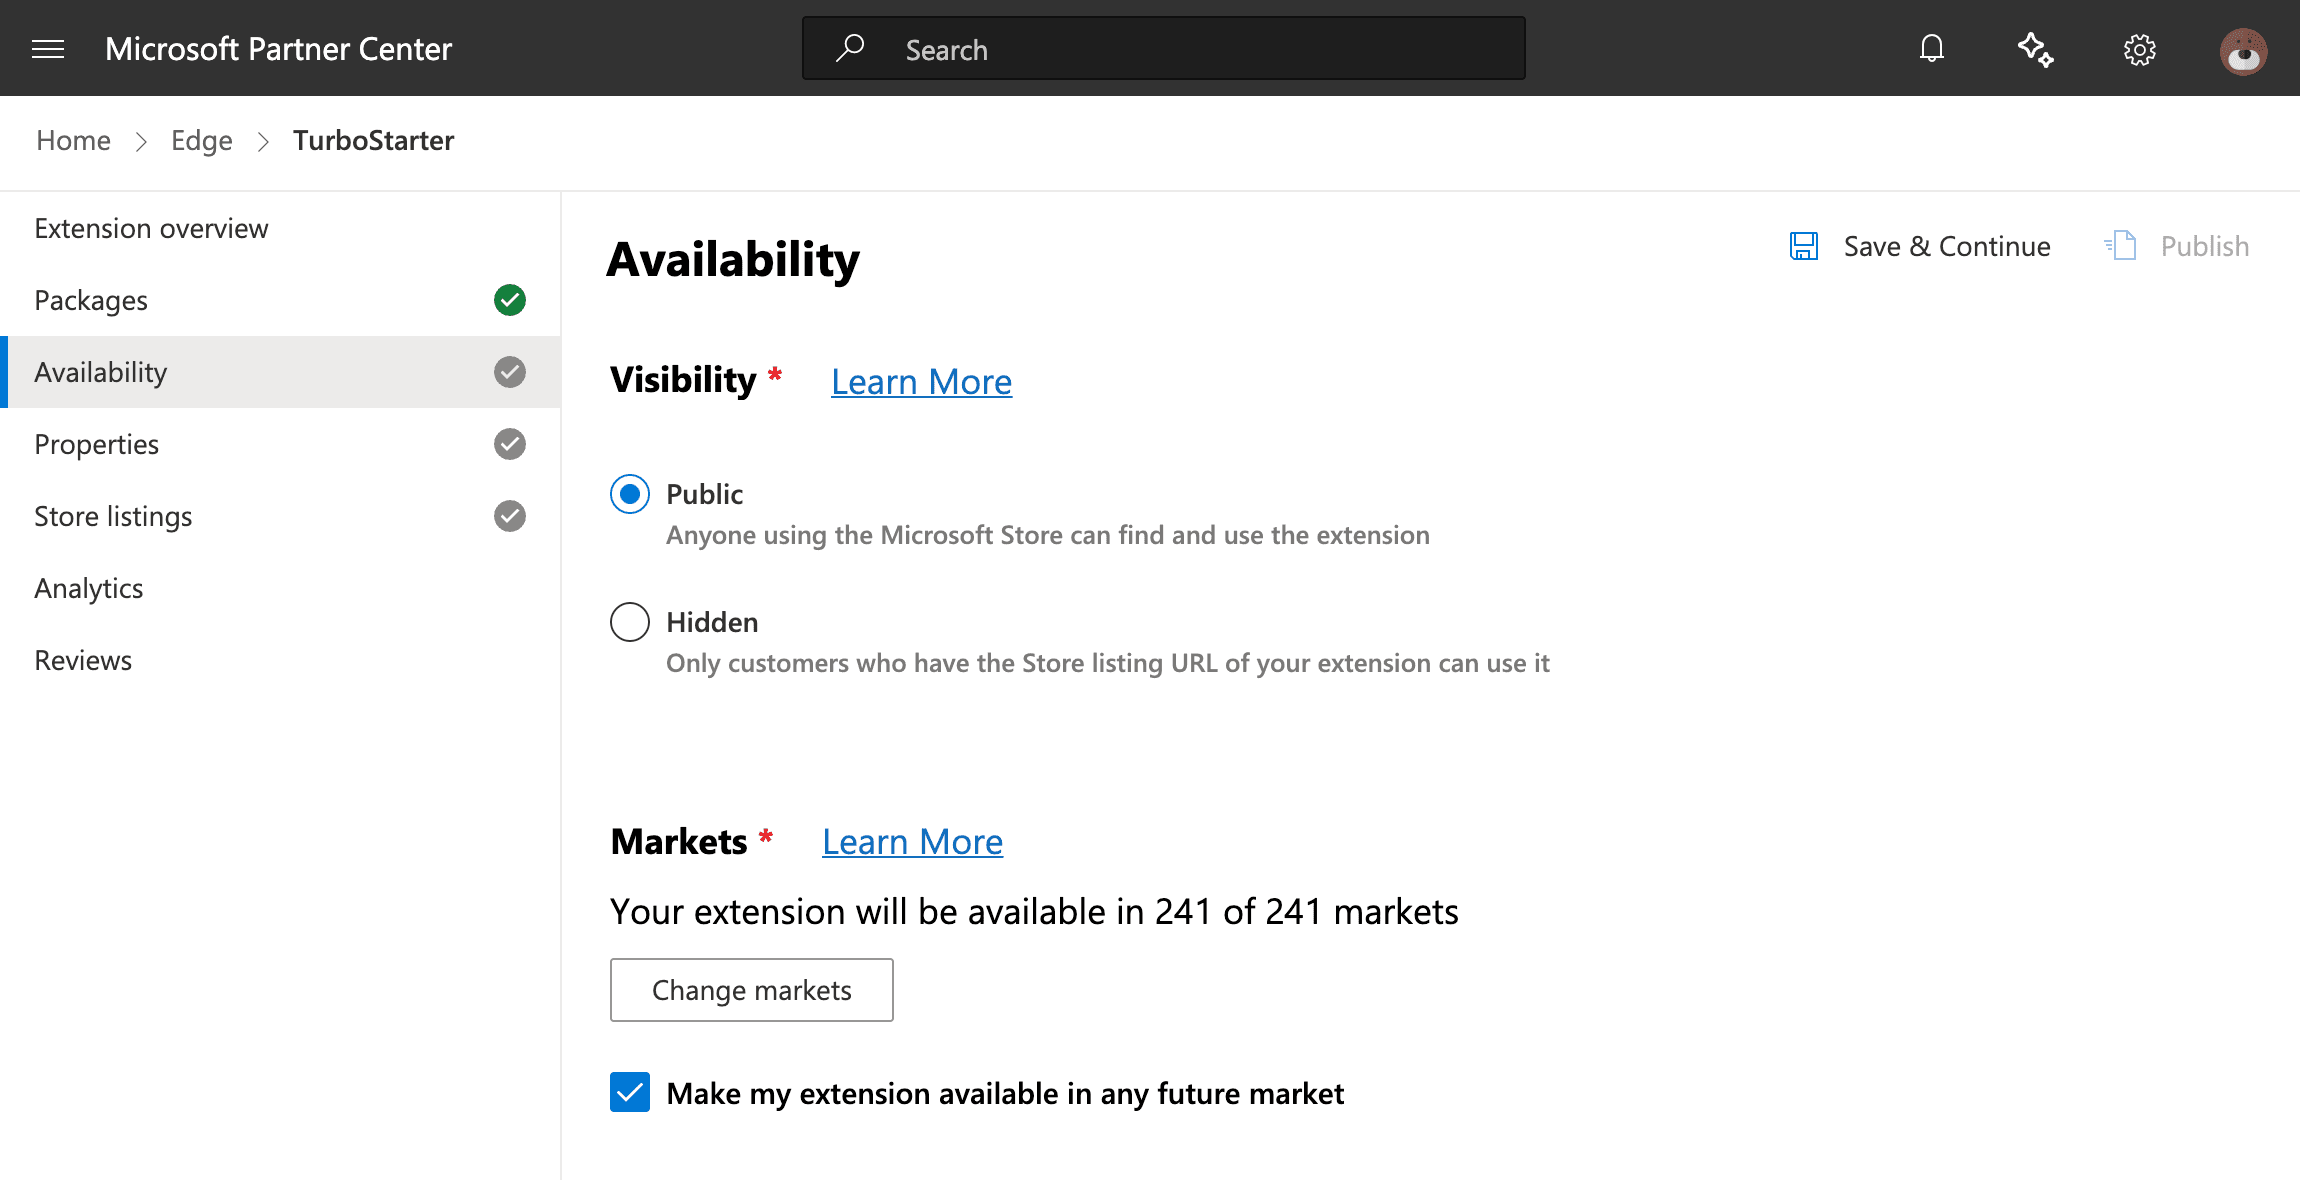
Set availability
Choose visibility:
Public: discoverable in the store and via search.Hidden: not discoverable; accessible via direct listing URL only.
Select markets where the extension is available. You can later add or remove markets; existing users retain access to installed versions.
Enter properties
Provide category, privacy policy requirements, privacy policy URL (if applicable), website URL, and support contact.
These are shown to users on the listing and must meet policy requirements.
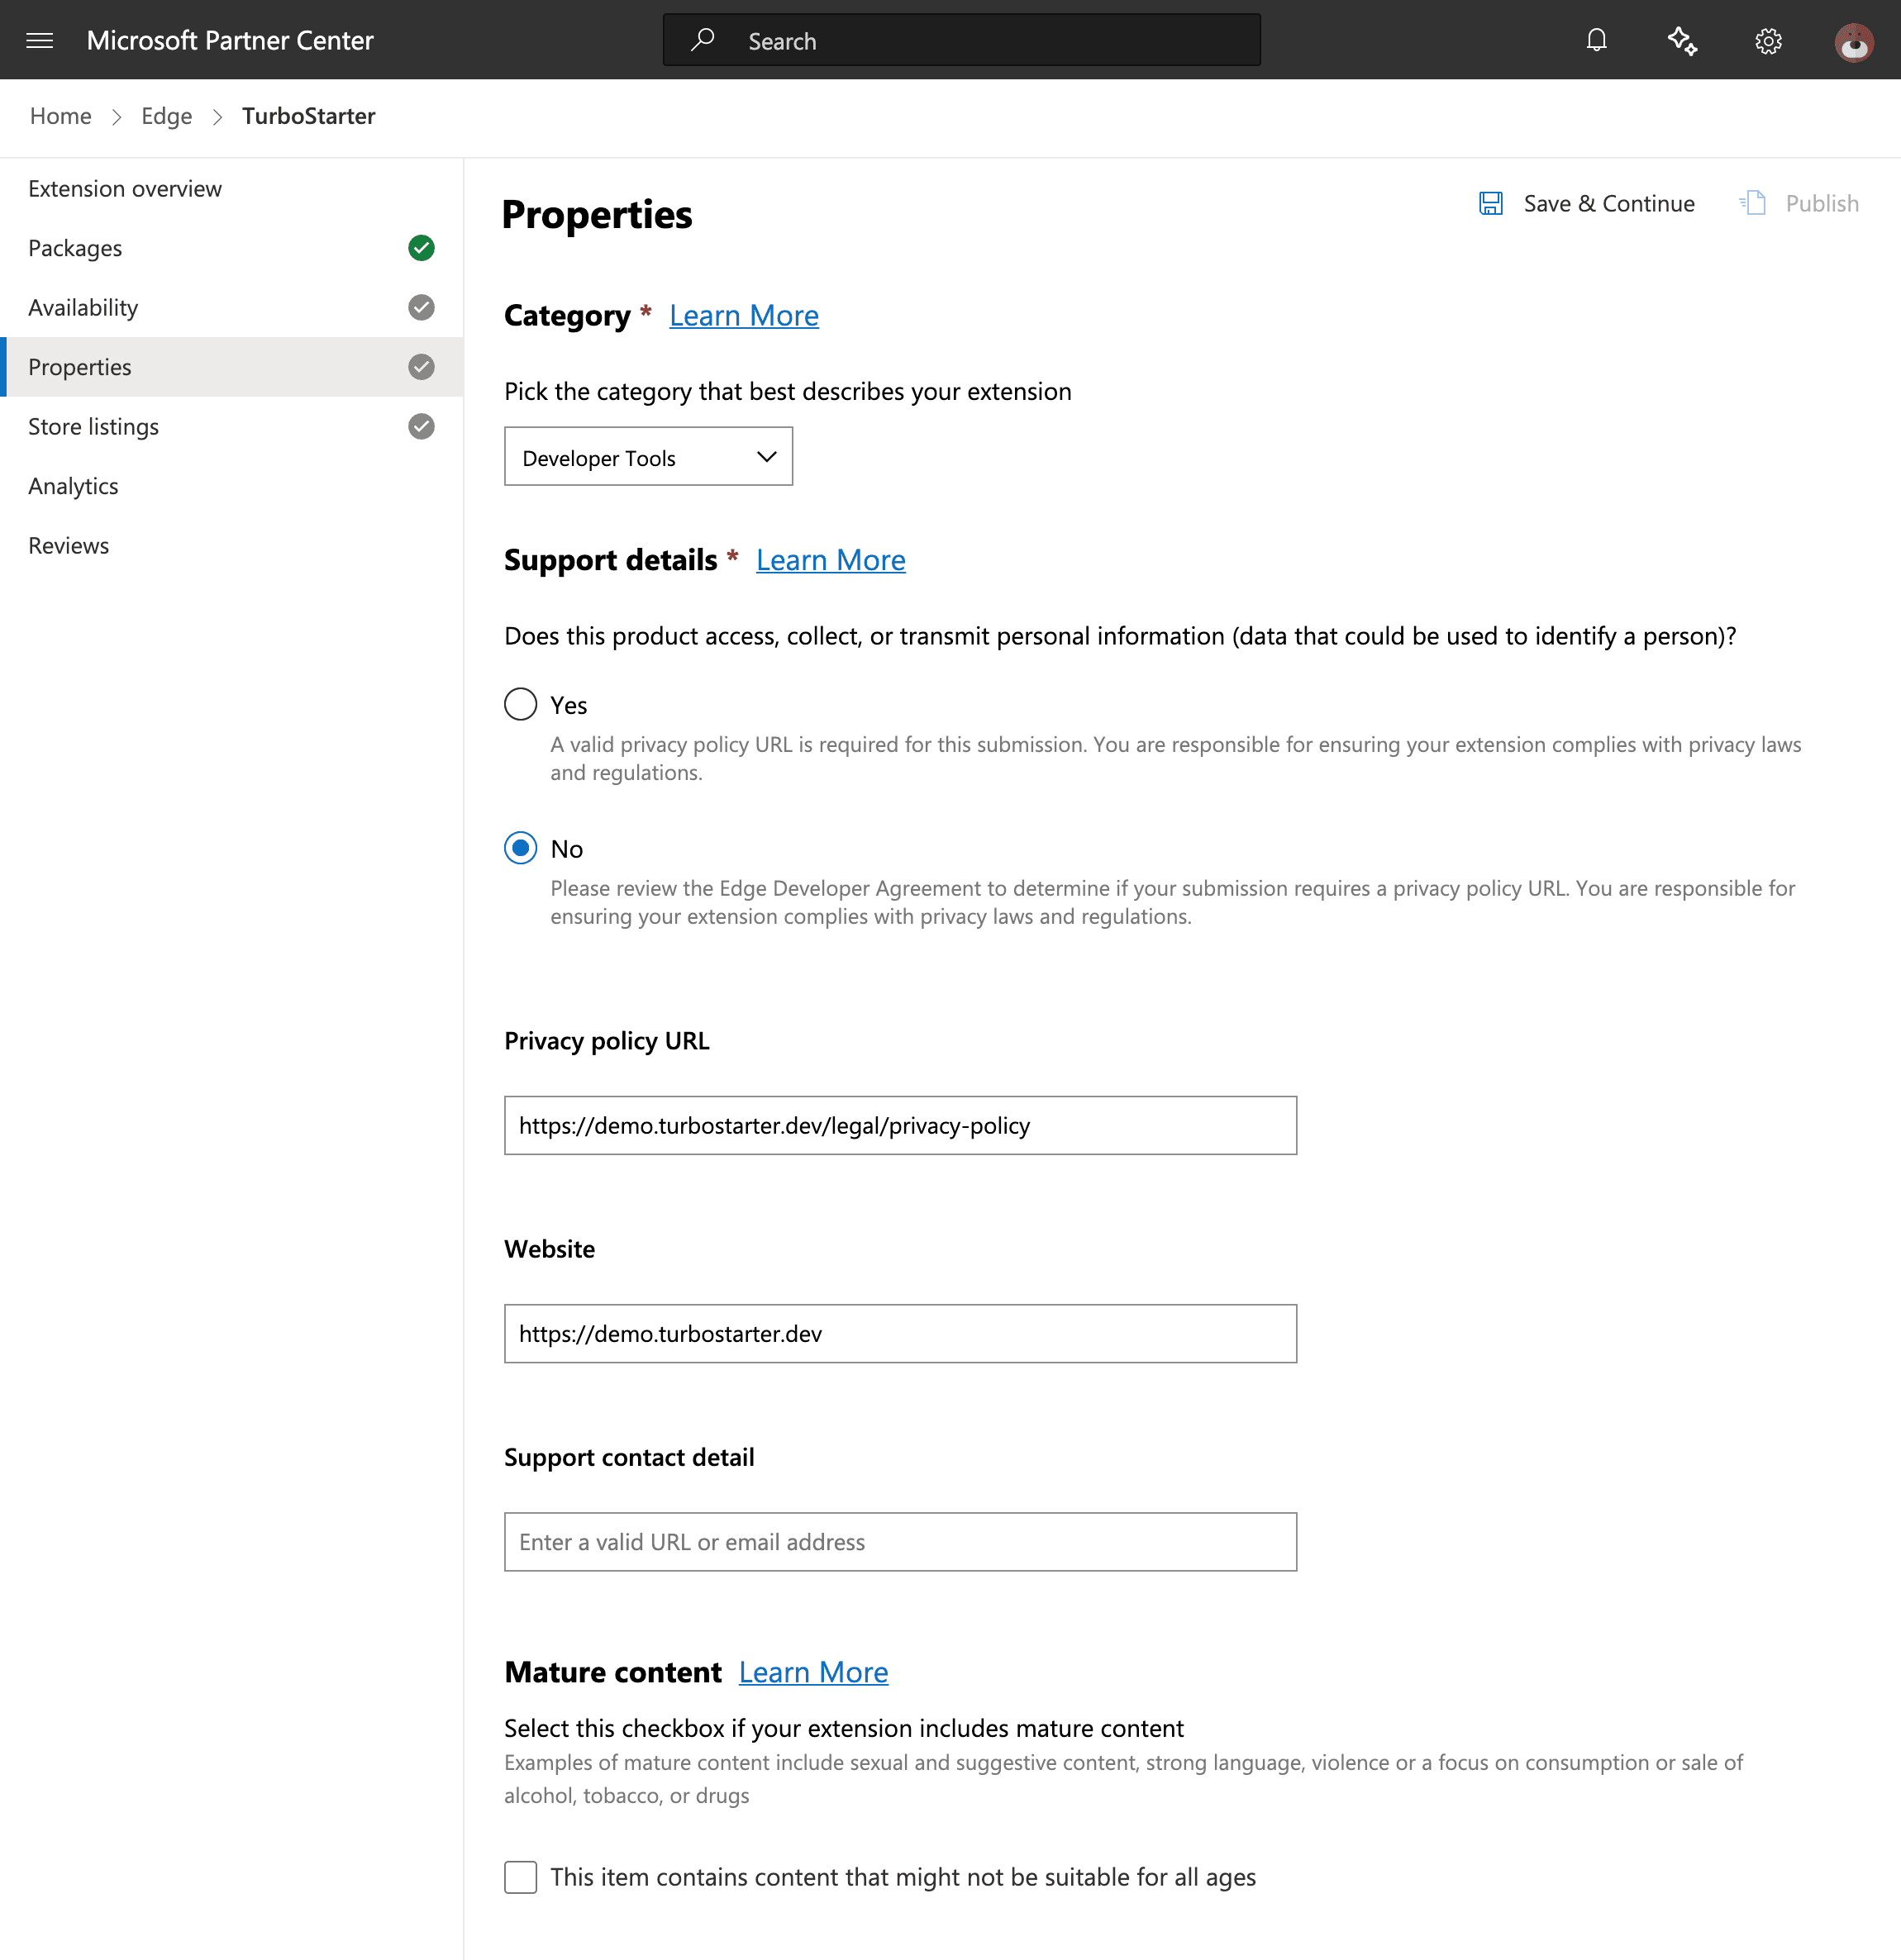
Follow the official documentation for more details.
Add store listing details
Fill in the store listing details for your extension:
- Display name: The name shown in the store (from your manifest file).
- Description: A detailed description (250-5000 characters) explaining what your extension does and why users should install it.
- Extension Store logo: A 300x300 pixel logo representing your extension.
- Screenshots: Up to 10 screenshots (640x480 or 1280x800 pixels) showing your extension's functionality.
- Small/Large promotional tiles: Optional promotional images for store featuring.
- YouTube video URL: Optional promotional video.
- Search terms: Keywords to help users discover your extension (up to 21 words total).
You must provide the description and logo for each supported language. Other fields are optional but recommended for better discoverability.
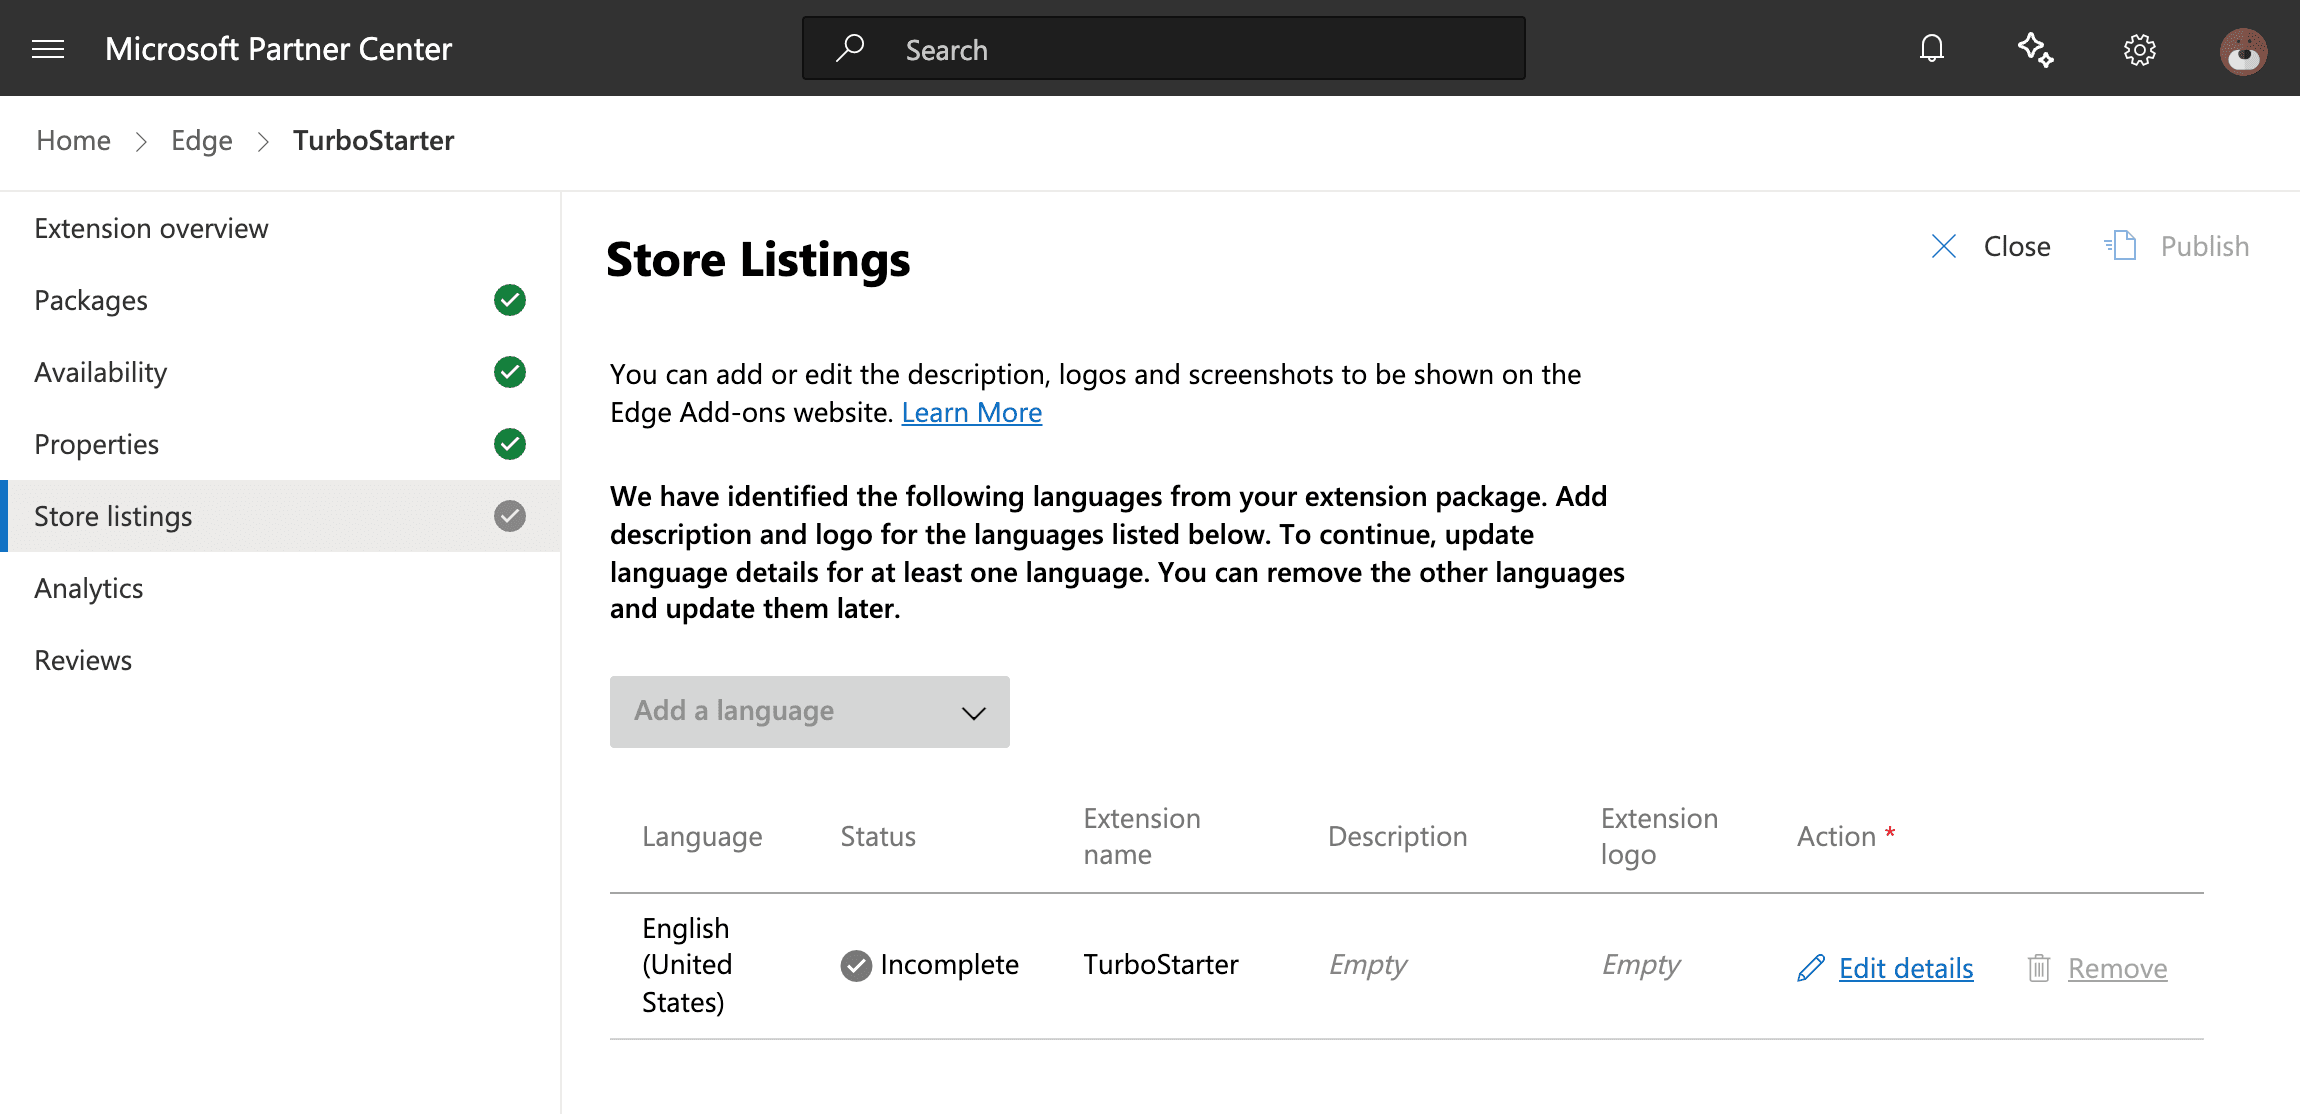
Follow the official documentation for detailed requirements and best practices.
Submit for review
Complete the submission by providing testing notes to help certification testers understand your extension.
Click the Submit button to open the submission page:
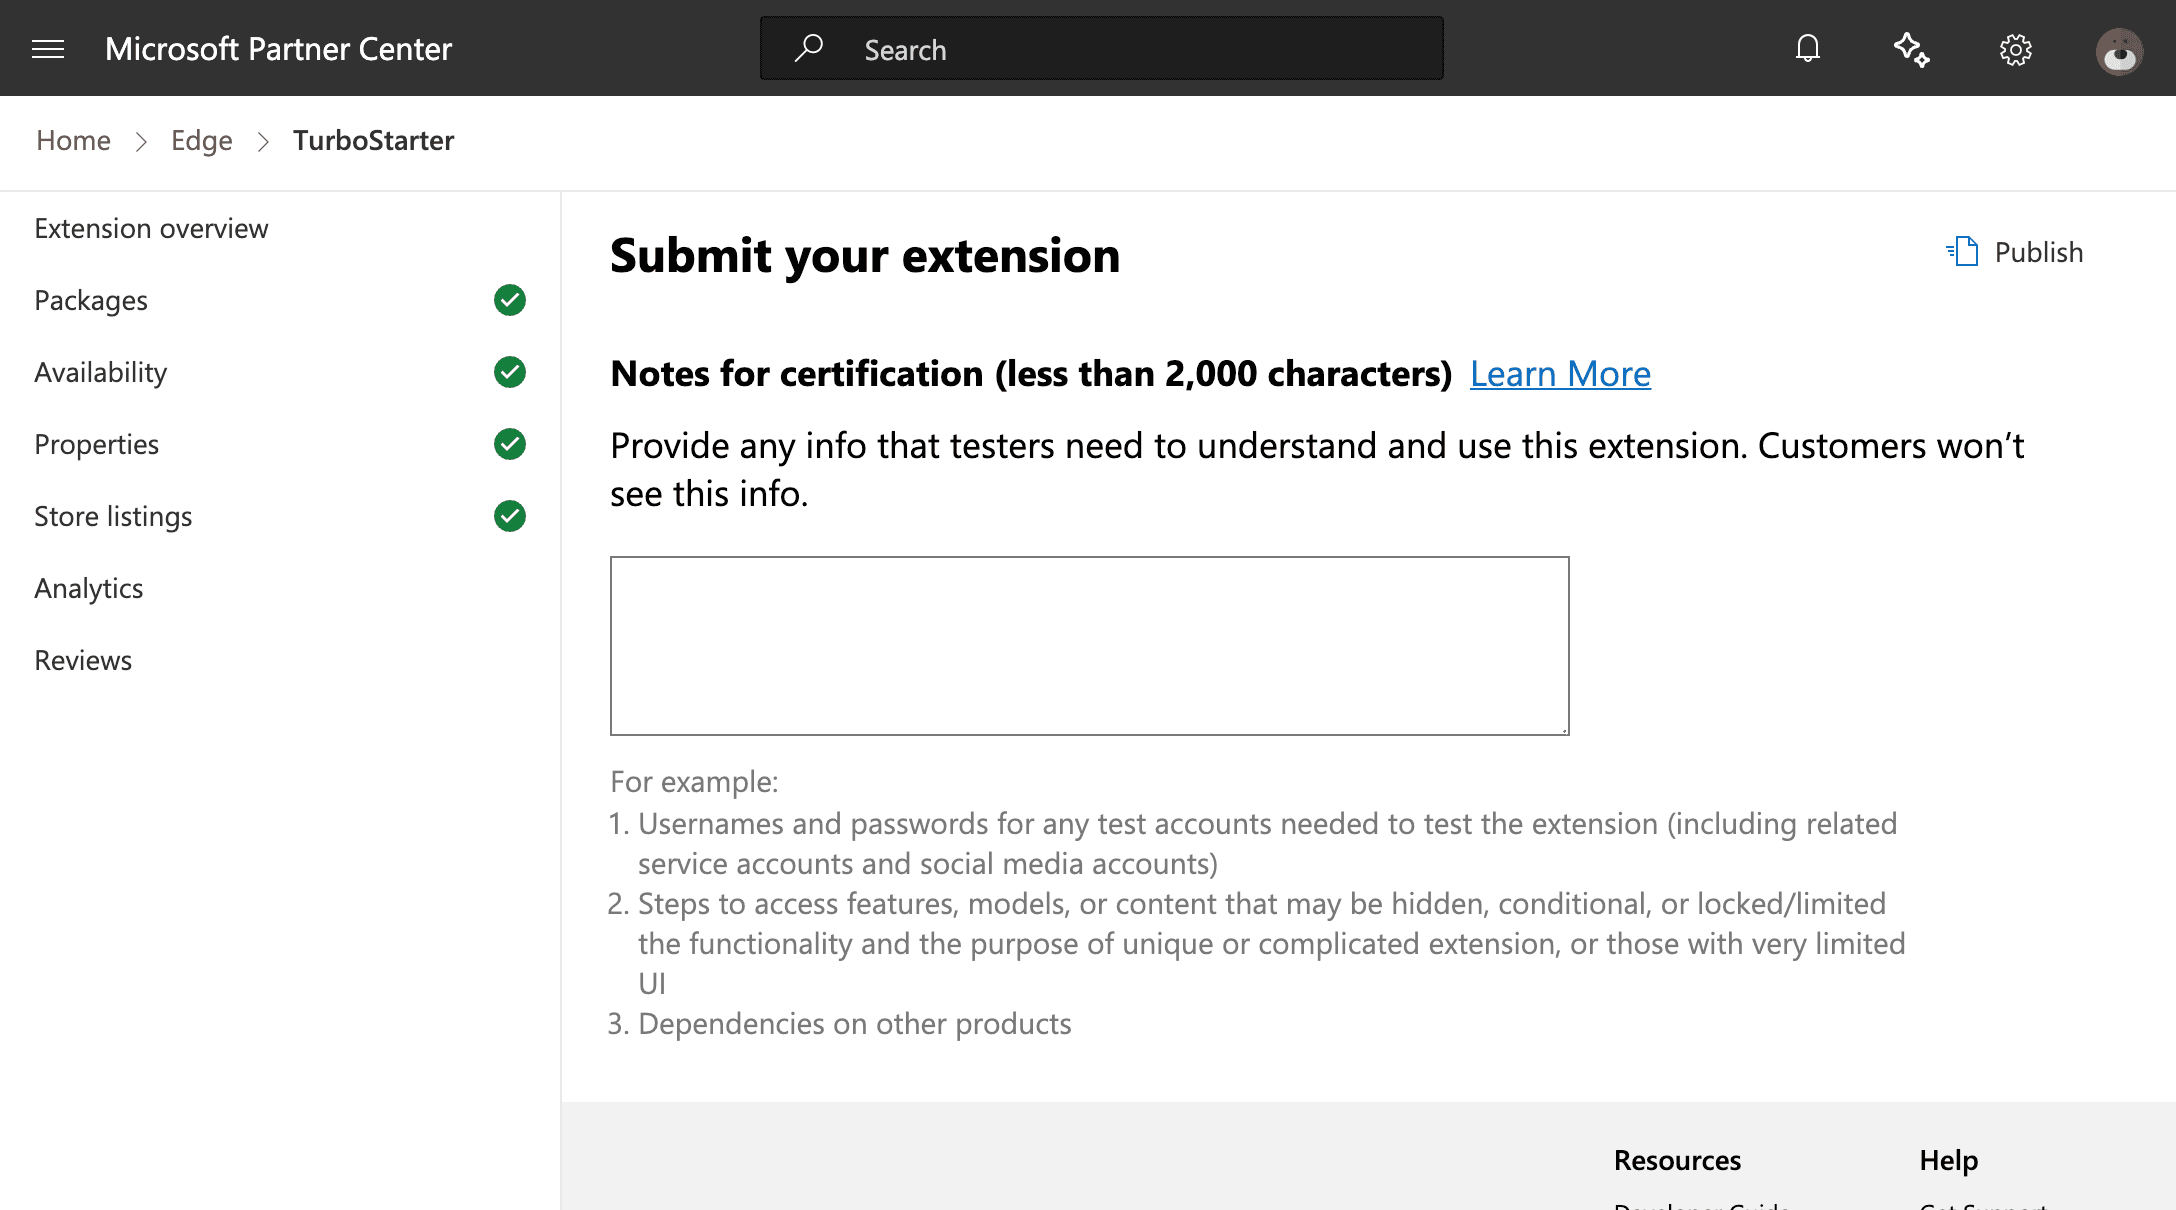
In the Notes for certification text box, provide additional information to help testers properly evaluate your extension. Include any relevant details such as:
- Test account usernames and passwords
- Steps to access hidden or locked features
- Expected differences based on region or user settings
- Information about changes if this is an update
- Any other context testers need to understand your submission
Once you've added your notes, click the Publish button to submit your extension for certification.
Your extension will proceed to the certification step, which can take up to seven business days.
After passing certification, your extension will be published to Microsoft Edge Add-ons and the status in Partner Center will change to "In the Store".
Publish a Microsoft Edge extension
learn.microsoft.com
Curation and review process for extensions at Microsoft Edge Add-ons
learn.microsoft.com
Automated submission
First submission must be done manually
The first submission of your extension to Microsoft Edge Add-ons must be done manually because you need to provide the store's credentials and extension ID to automation, which will be available only after the first bundle upload.
TurboStarter comes with a pre-configured GitHub Actions workflow to submit your extension to web stores automatically. It's located in the .github/workflows/publish-extension.yml file.
What you need to do is fill the environment variables with your store's credentials and extension's details and set them as a secrets in your Github repository under correct names:
env:
  EDGE_PRODUCT_ID: ${{ secrets.EDGE_PRODUCT_ID }}
  EDGE_CLIENT_ID: ${{ secrets.EDGE_CLIENT_ID }}
  EDGE_API_KEY: ${{ secrets.EDGE_API_KEY }}
Please refer to the official guide to learn how to get these credentials correctly.
Once configured, you can manually trigger the workflow to upload the new version to Edge Add-ons 🎉
Automated submission to review
This workflow will also try to send your extension to review, but it's not guaranteed to happen. You need to have all required information filled in your extension's details page to make it possible.
Even then, when you introduce some breaking change (e.g. add another permission), you'll need to update your extension store metadata and automatic submit won't be possible.
To opt out of this behavior (and use only automatic uploading to store, but not sending to review) you can set --edge-skip-submit-review flag in the publish-extension.yml file for the wxt submit command:
- name: 💨 Publish!
  run: |
    npx wxt submit \
      --edge-zip apps/extension/build/*-chrome.zip --edge-skip-submit-review
Then, your extension bundle will be uploaded to the store, but you will need to send it to review manually.
Check out the official documentation for more customization options.
Alternative ways to distribute an extension
learn.microsoft.com
REST API for updating an extension
learn.microsoft.com
Review
After you submit your extension, it enters Microsoft's certification and publishing pipeline.
- Preprocessing
- Uploaded packages are queued and scanned. If errors are detected during preprocessing, you'll see a message and must resolve issues before re-uploading.
- Certification
- Security tests: packages are checked for viruses and malware.
- Content compliance: human review of your listing and content for policy adherence.
- Release and publishing
- If you selected publish immediately, publishing begins right away; otherwise schedule/hold options apply.
- While publishing, the submission status page shows rollout details. When complete, the status changes from "Publishing" to "In the Store".
- Edge Add-ons curation and ranking
- Discovery is influenced by quality, relevancy (name, description, popularity, user experience), and popularity (ratings and averages). Security and policy compliance are verified per the developer policies.
Microsoft may also perform spot checks after publishing to ensure ongoing compliance.
The review status of your item appears in the Partner Center under the Overview page of your item.
You'll receive an email notification when the status of your item changes.
Your submission might be rejected
If your extension has been determined to violate one or more terms or policies, you will receive an email notification that contains the violation description and instructions on how to rectify it.
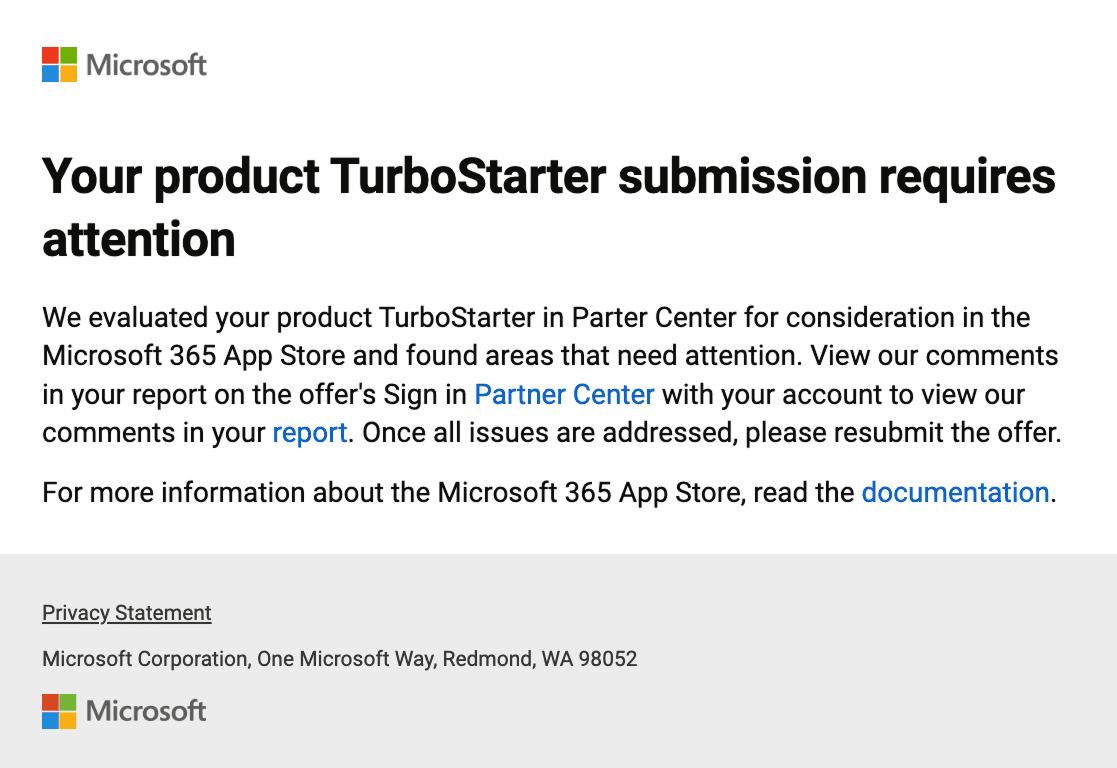
You can also check the reason behind the rejection on the Certification report page of your item.
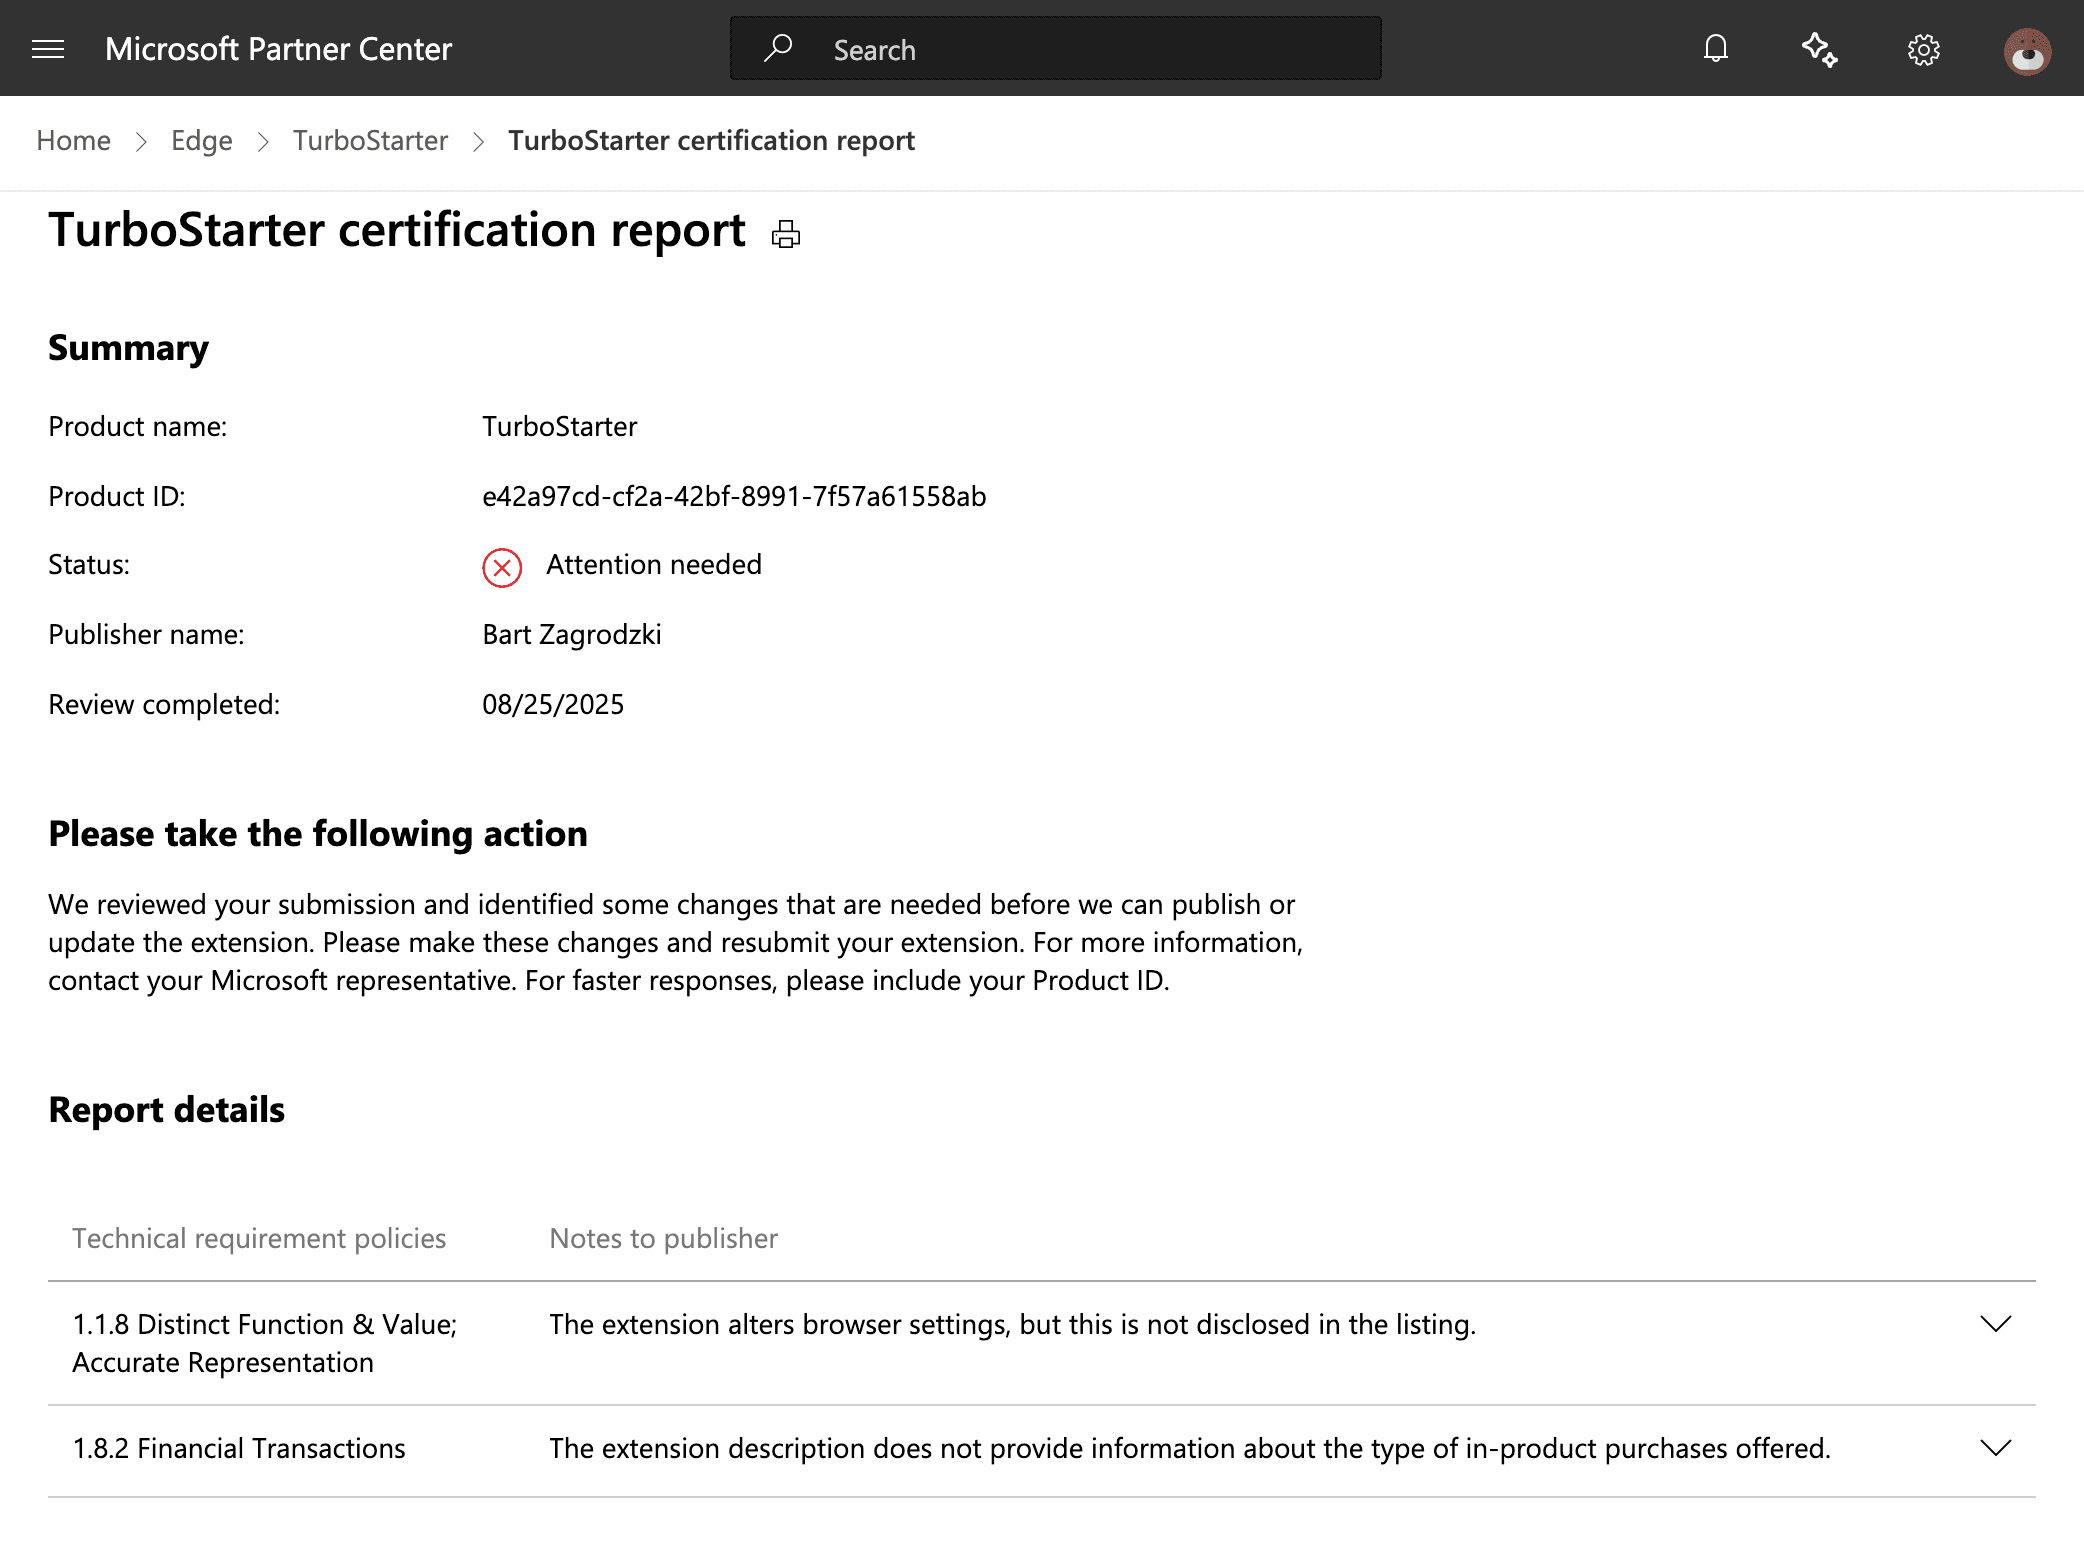
You'll need to fix the issues and upload a new version of your extension. Make sure to follow the guidelines or check publishing troubleshooting for more info.
You can learn more about the review process in the official guides listed below.
How is this guide?
Last updated on