Native mobile apps for web developers - complete Expo (React Native) guide
Learn how to build native mobile apps with Expo and React Native using your web skills. Covers setup, UI patterns, device APIs, workflows, and deployment.

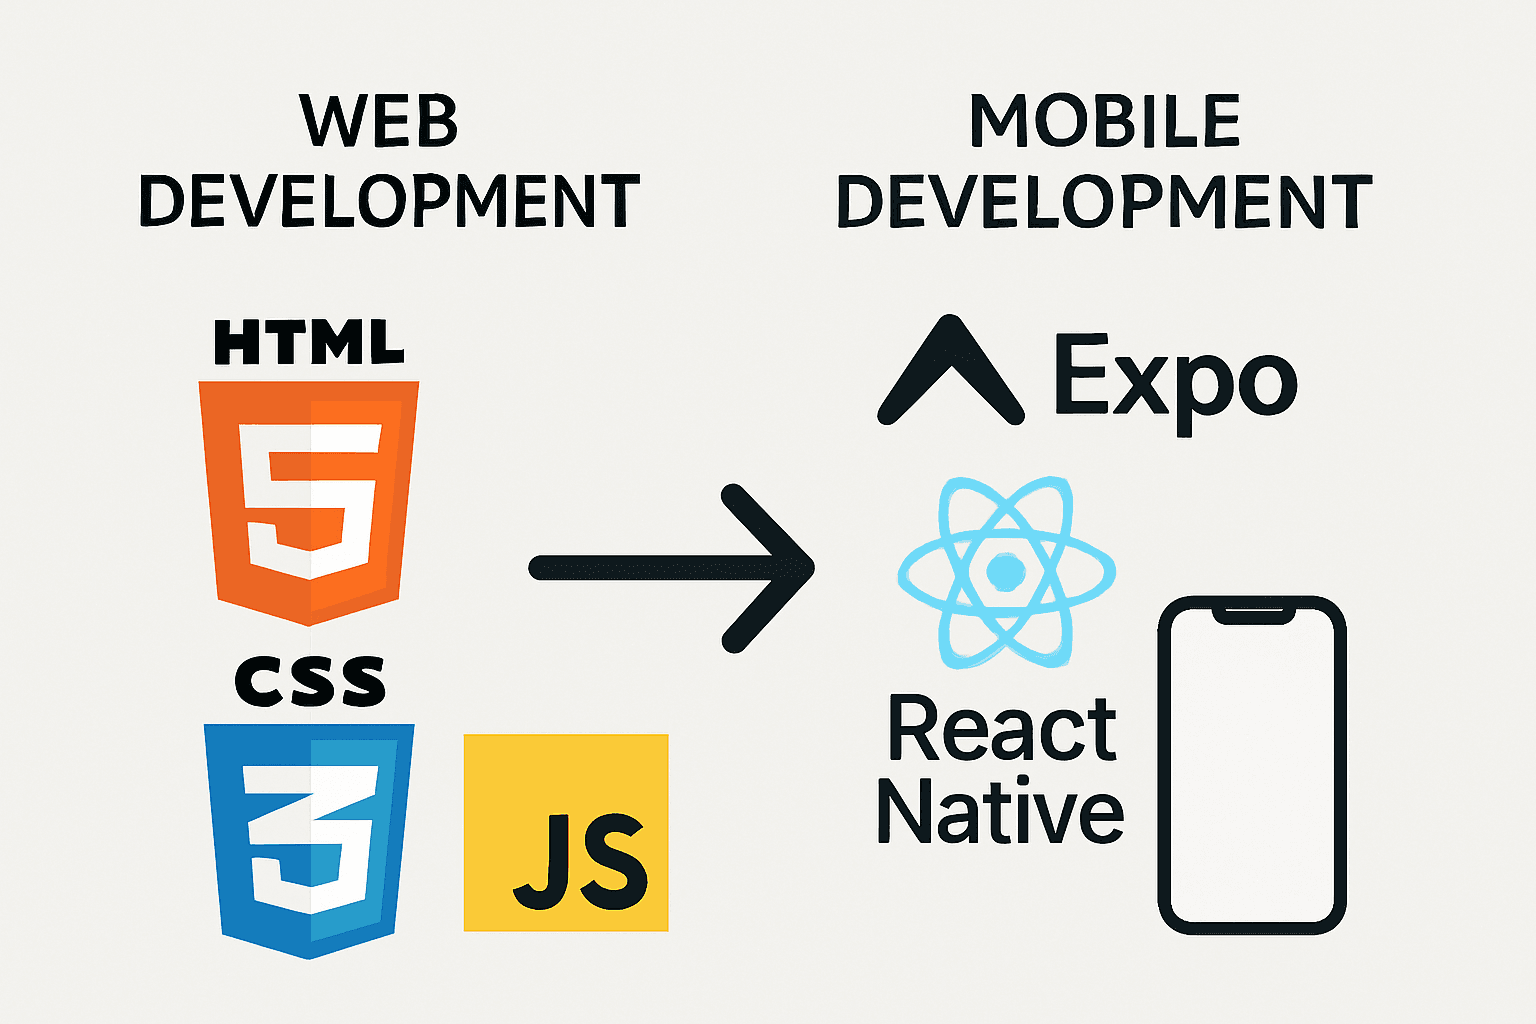
If you're a web developer looking to break into mobile app development, you've likely encountered a common challenge: the steep learning curve associated with native mobile development. Learning Swift or Kotlin, understanding platform-specific APIs, and managing complex build systems can be overwhelming. This is where Expo React Native comes in as a game-changer for web developers.
Expo simplifies React Native development by providing a comprehensive framework that eliminates many of the complexities traditionally associated with mobile app development. By leveraging your existing JavaScript and React knowledge, Expo creates a smooth pathway for web developers to build high-quality, native mobile applications for both iOS and Android platforms.
The beauty of Expo React Native lies in its ability to abstract away the complex native build configurations while still providing access to native device features. This means you can focus on creating great user experiences rather than struggling with platform-specific setup and configuration.
Want to get started with Expo React Native quickly? Check out the TurboStarter Mobile Kit with pre-configured Expo setup and essential features ready to go.
What is Expo React Native and why is it perfect for web developers?
Expo is an open-source platform built around React Native that enables developers to create universal native apps using JavaScript. While React Native itself provides the framework for building native mobile apps with React, Expo enhances this experience by offering a managed environment with additional tools, services, and APIs that simplify the development process.
For web developers, Expo React Native offers several compelling advantages:
-
Familiar Technology Stack: If you already know JavaScript and React, you're well-positioned to start building with Expo React Native. The component-based architecture mirrors what you're used to in web development.
-
Simplified Setup: Expo eliminates the need to install and configure complex native development environments like Xcode or Android Studio, allowing you to get started in minutes.
-
Rapid Iteration: With Expo's hot reloading and instant previewing capabilities, you can see changes immediately, similar to modern web development workflows.
-
Extensive API Library: Expo provides JavaScript APIs for accessing native device features like camera, location, and notifications without writing native code.
-
Over-the-Air Updates: Deploy app updates instantly without going through the app store review process, similar to updating web applications.
Expo React Native is not just a tool but an ecosystem that makes mobile development accessible to web developers by leveraging their existing skills and providing a simplified path to native app development.
The evolution of mobile app development for web developers
The journey to make mobile development more accessible to web developers has been ongoing for years. Let's trace the evolution that led to today's Expo React Native ecosystem:
Early Cross-Platform Approaches (2009-2014):
- PhoneGap/Cordova emerged as one of the first attempts to use web technologies for mobile development
- These early solutions essentially wrapped web views in native containers
- While accessible to web developers, they often suffered from performance issues and limited access to native features
The React Native Revolution (2015):
- Facebook introduced React Native as a way to build truly native mobile applications using React
- This approach offered better performance than web views while still using JavaScript
- However, the initial setup and configuration remained complex, requiring knowledge of native development tools
The Rise of Expo (2016-Present):
- Expo was created to address the complexity barriers in React Native
- It introduced a managed workflow that eliminated the need for native build tools
- Over time, Expo has evolved from a simple tool to a comprehensive platform with extensive features and services
Today, Expo React Native represents the culmination of this evolution, offering web developers the most accessible path to building high-quality native mobile applications without sacrificing performance or capabilities.
What are the key advantages of Expo React Native over traditional mobile development?
When comparing Expo React Native to traditional native development approaches (using Swift/Objective-C for iOS or Java/Kotlin for Android), the advantages become immediately apparent. Traditional native development typically requires:
| Traditional Native Development | Expo React Native Development |
|---|---|
| Learning platform-specific languages (Swift, Kotlin) | Using JavaScript as a single language for all platforms |
| Setting up complex development environments (Xcode, Android Studio) | Simple CLI-based setup with minimal configuration |
| Understanding platform-specific APIs and design patterns | Working with unified cross-platform APIs |
| Managing separate codebases for iOS and Android | Maintaining a single codebase for all platforms |
This translates to significant time and resource savings. While a traditional native app might take months to develop for both platforms, an Expo React Native app can often be built in a fraction of that time, sometimes weeks or even days for simpler applications.
The development speed advantage comes not just from code reuse but also from Expo's streamlined workflow. Tasks that would typically require complex configuration in native development—like setting up push notifications, accessing camera functionality, or implementing maps—can be accomplished with just a few lines of JavaScript code in Expo.
Cross-platform capabilities and code reusability
One of the most compelling advantages of Expo React Native is its "write once, run anywhere" philosophy. This approach allows developers to maintain a single codebase that works across multiple platforms, including:
- iOS devices (iPhones and iPads)
- Android devices (phones and tablets)
- Web browsers (through React Native Web)
This cross-platform capability is achieved through several key mechanisms:
Shared Business Logic: Core application logic, API calls, state management, and data processing can be written once and shared across all platforms. For example, the same authentication flow or data fetching mechanism works identically regardless of platform.
Platform-Specific Adaptations: When needed, Expo provides ways to implement platform-specific behavior through conditional code:
import { Platform } from "react-native";

const instructions = Platform.select({
  ios: "Press Cmd+R to reload,\nCmd+D for dev menu",
  android: "Double tap R to reload,\nShake for dev menu",
  web: "Press Ctrl+R to reload",
});
Component Abstraction: Expo and React Native provide components that automatically adapt to platform conventions, such as buttons that look native on each platform while using the same code.
Here's a simple component that works across platforms with no modifications needed:
import React, { useState } from "react";
import { View, Text, Button, StyleSheet } from "react-native";

export function Counter() {
  const [count, setCount] = useState(0);
  return (
    <View style={styles.container}>
      <Text style={styles.count}>Count: {count}</Text>
      <Button title="Increment" onPress={() => setCount(count + 1)} />
    </View>
  );
}

const styles = StyleSheet.create({
  container: { padding: 20, alignItems: "center" },
  count: { fontSize: 24, marginBottom: 20 },
});
This same component works on iOS, Android, and web without modification, rendering with native UI elements on each platform while maintaining consistent functionality.
Development workflow improvements
Expo React Native introduces several workflow improvements that dramatically enhance developer productivity:
Hot Reloading: Changes to your code are instantly reflected in the development environment without requiring a full rebuild. This creates a tight feedback loop similar to modern web development.
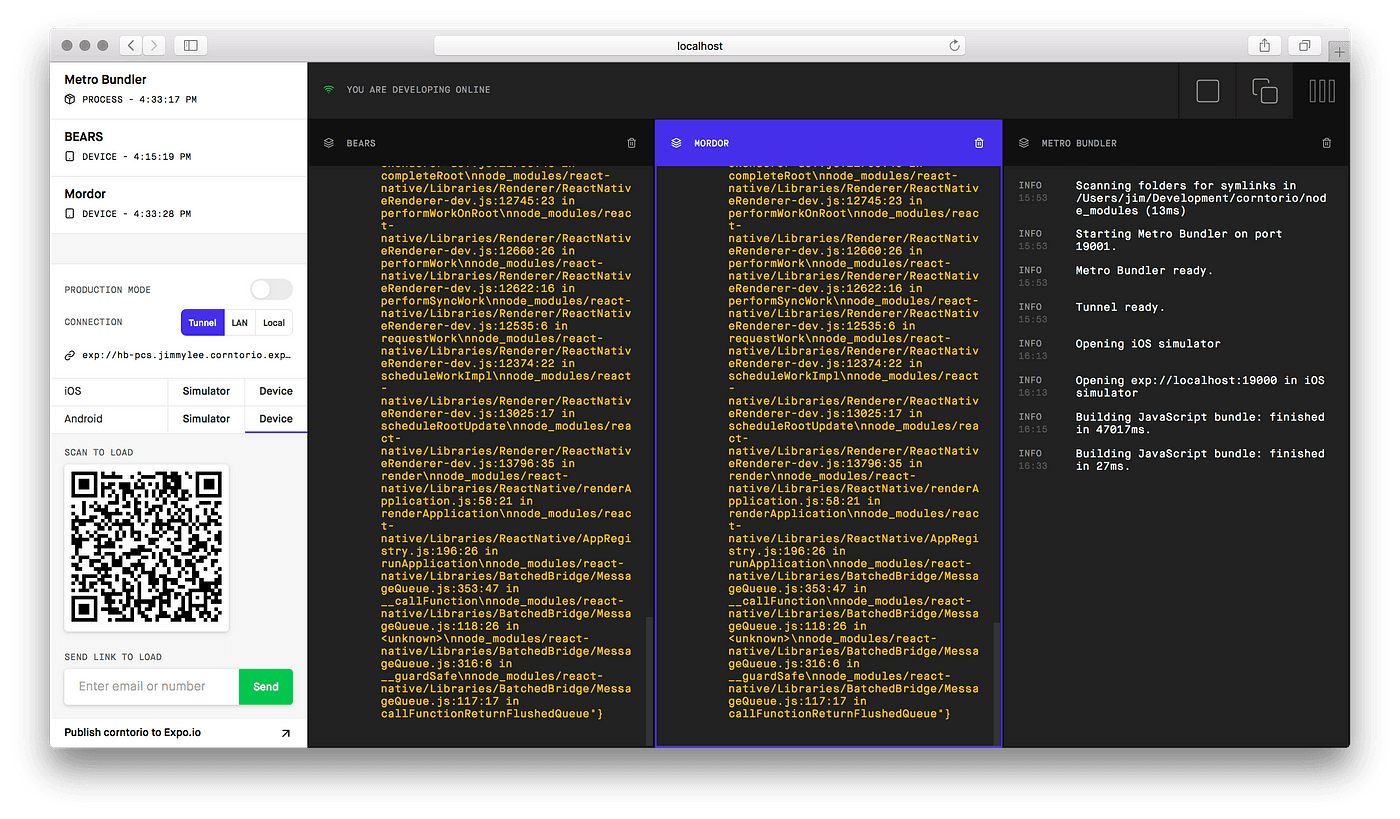
Expo Go App: The Expo Go app allows you to run your application on physical devices without going through the complex process of building and deploying native binaries. Simply scan a QR code, and your app runs instantly on your device.
Over-the-Air Updates: Once your app is published, you can push updates directly to users without requiring them to download a new version from the app store. This is particularly valuable for fixing bugs or deploying minor feature enhancements.
- Write JavaScript code
- Test instantly via Expo Go app
- Iterate quickly with hot reloading
- Deploy to app stores or push OTA updates
- Write native code for each platform
- Compile and build the app
- Deploy to simulator or device
- Repeat for each platform
- Submit new builds for each update
Managed Workflow: Expo's managed workflow abstracts away the complexity of native build configurations, allowing you to focus on writing application code rather than managing build systems.
Expo Application Services (EAS): EAS provides cloud-based build services that eliminate the need to maintain local build environments for creating production-ready binaries.
These workflow improvements collectively reduce the friction in mobile development, allowing web developers to apply their existing skills to mobile without getting bogged down in platform-specific complexities. If you're interested in optimizing your development workflow even further, check out our guide on 10 advanced Turbo CLI techniques to boost your development workflow.
Setting Up Your Development Environment for Expo React Native
Setting up your development environment for Expo React Native is remarkably straightforward, especially compared to traditional native development. Before diving into the installation process, let's ensure you have the prerequisites in place.
Prerequisites for Expo React Native development:
-
Node.js: Expo requires Node.js version 14 or higher. You can download it from nodejs.org.
-
npm or Yarn: These package managers come with Node.js (npm) or can be installed separately (Yarn).
-
Code Editor: While any text editor will work, Visual Studio Code is highly recommended due to its excellent JavaScript and React Native support. For an AI-enhanced coding experience, you might want to check out Cursor AI.
-
Mobile Device or Simulator: You'll need either:
- A physical iOS or Android device with the Expo Go app installed
- iOS Simulator (macOS only, comes with Xcode)
- Android Emulator (available through Android Studio)
If you're a web developer who's never worked with mobile development before, don't worry about setting up simulators right away. You can get started using just the Expo Go app on your personal device!
Installing and configuring Expo CLI
The Expo Command Line Interface (CLI) is the primary tool you'll use to create, develop, and manage your Expo React Native projects. Here's how to install it:
Install Expo CLI globally
Using npm:
npm install -g expo-cli Or using Yarn:
yarn global add expo-cli Verify the installation Ensure Expo CLI was installed correctly by
running: bash expo --version This should display the installed version
number.
Create an Expo account (optional but recommended)
While not strictly required for development, an Expo account provides additional features like publishing updates and building standalone apps.
expo register Or register at expo.dev
Once installed, you can explore the available Expo CLI commands with:
expo --helpSome of the most commonly used Expo CLI commands include:
expo init: Create a new Expo projectexpo start: Start the development serverexpo publish: Publish your project to Expo's serversexpo build:android: Build an Android APK or App Bundleexpo build:ios: Build an iOS IPA fileexpo eject: Eject from the managed workflow to the bare workflow
Creating your first Expo React Native project
Now that you have Expo CLI installed, let's create your first project:
Initialize a new project
expo init MyFirstExpoApp You'll be prompted to choose a template. For beginners, the "blank" template is a good starting point.
Navigate to your project directory bash cd MyFirstExpoApp
Start the development server bash expo start This will open a new
browser window with the Expo Developer Tools.
Run on a device or simulator
- To run on a physical device: Scan the QR code with the Expo Go app (Android) or the Camera app (iOS)
- To run on iOS Simulator: Press
iin the terminal - To run on Android Emulator: Press
ain the terminal
Let's take a moment to understand the project structure that Expo has created:
MyFirstExpoApp/
├── .expo/              # Expo configuration files
├── assets/             # Static assets like images and fonts
├── node_modules/       # Project dependencies
├── .gitignore          # Git ignore file
├── App.js              # Main application component
├── app.json            # Expo configuration
├── babel.config.js     # Babel configuration
├── package.json        # Project metadata and dependencies
└── README.md           # Project documentation
The key configuration files to understand are:
app.json: This file contains configuration for your Expo project, including:
- App name and slug
- Version numbers
- Splash screen and icon settings
- Permissions required by your app
- Platform-specific settings
Here's a sample app.json file:
{
  "expo": {
    "name": "My First Expo App",
    "slug": "my-first-expo-app",
    "version": "1.0.0",
    "orientation": "portrait",
    "icon": "./assets/icon.png",
    "splash": {
      "image": "./assets/splash.png",
      "resizeMode": "contain",
      "backgroundColor": "#ffffff"
    },
    "updates": {
      "fallbackToCacheTimeout": 0
    },
    "assetBundlePatterns": ["**/*"],
    "ios": {
      "supportsTablet": true
    },
    "android": {
      "adaptiveIcon": {
        "foregroundImage": "./assets/adaptive-icon.png",
        "backgroundColor": "#FFFFFF"
      }
    },
    "web": {
      "favicon": "./assets/favicon.png"
    }
  }
}package.json: This file manages your project dependencies and scripts, similar to web development projects.
With your project set up, you're now ready to start building your first Expo React Native application! If you'd prefer a more comprehensive starting point with authentication, navigation, and other common features already set up, check out TurboStarter's Mobile Kit for a production-ready foundation.
How to build mobile apps with Expo: A step-by-step tutorial for beginners
Building mobile apps with Expo React Native follows a development workflow that will feel familiar to web developers while introducing mobile-specific concepts. Let's walk through the process of creating a simple but functional app to demonstrate the key concepts.
The typical Expo React Native development workflow follows these general steps:
- Planning: Define the app requirements, features, and user interface design
- Setup: Create a new Expo project with the appropriate template
- Development: Build the UI components, implement functionality, and connect to data sources
- Testing: Test the app on multiple devices and platforms
- Deployment: Build production-ready binaries and submit to app stores
Throughout this process, Expo provides tools that simplify each step, particularly for testing and previewing your application. The Expo Go app is especially valuable during development, as it allows you to run your app on physical devices without complex build processes.

To demonstrate this workflow, let's build a simple weather app that fetches current weather data based on the user's location. This example will incorporate several key concepts:
- Creating UI layouts with React Native components
- Implementing navigation between screens
- Accessing device features (geolocation)
- Making API requests to external services
Building a simple mobile app interface
Let's start by creating the main weather display screen for our app. We'll use React Native's core components to create a responsive layout:
// screens/WeatherScreen.js
import React, { useState, useEffect } from "react";
import {
  View,
  Text,
  StyleSheet,
  ActivityIndicator,
  SafeAreaView,
} from "react-native";

export default function WeatherScreen() {
  const [loading, setLoading] = useState(true);
  const [weatherData, setWeatherData] = useState(null);

  // We'll add the data fetching logic later
  useEffect(() => {
    // Simulate loading data
    setTimeout(() => {
      setWeatherData({
        location: "San Francisco",
        temperature: 72,
        condition: "Sunny",
        humidity: 65,
      });
      setLoading(false);
    }, 2000);
  }, []);

  if (loading) {
    return (
      <View style={styles.loadingContainer}>
        <ActivityIndicator size="large" color="#0000ff" />
        <Text style={styles.loadingText}>Loading weather data...</Text>
      </View>
    );
  }

  return (
    <SafeAreaView style={styles.container}>
      <View style={styles.weatherContainer}>
        <Text style={styles.location}>{weatherData.location}</Text>
        <Text style={styles.temperature}>{weatherData.temperature}°F</Text>
        <Text style={styles.condition}>{weatherData.condition}</Text>
        <View style={styles.detailsContainer}>
          <Text style={styles.detailsText}>
            Humidity: {weatherData.humidity}%
          </Text>
        </View>
      </View>
    </SafeAreaView>
  );
}

const styles = StyleSheet.create({
  container: { flex: 1, backgroundColor: "#f5f5f5" },
  loadingContainer: { flex: 1, justifyContent: "center", alignItems: "center" },
  loadingText: { marginTop: 10, fontSize: 16 },
  weatherContainer: {
    flex: 1,
    alignItems: "center",
    justifyContent: "center",
    padding: 20,
  },
  location: { fontSize: 24, fontWeight: "bold", marginBottom: 10 },
  temperature: { fontSize: 72, fontWeight: "200" },
  condition: { fontSize: 24, marginVertical: 10 },
  detailsContainer: {
    marginTop: 20,
    borderTopWidth: 1,
    borderTopColor: "#ddd",
    paddingTop: 20,
    width: "100%",
    alignItems: "center",
  },
  detailsText: { fontSize: 18, marginBottom: 5 },
});
This component demonstrates several important React Native UI concepts:
- Responsive Layouts: Using
flexproperties to create layouts that adapt to different screen sizes - Conditional Rendering: Showing a loading indicator while data is being fetched
- Styling: Using StyleSheet to create styles similar to CSS
- Safe Areas: Using SafeAreaView to respect device-specific safe areas (like notches on iPhones)
Let's add a settings screen where users can customize the app:
// screens/SettingsScreen.js
import React, { useState } from "react";
import {
  View,
  Text,
  StyleSheet,
  Switch,
  TouchableOpacity,
  SafeAreaView,
} from "react-native";

export default function SettingsScreen({ navigation }) {
  const [useCelsius, setUseCelsius] = useState(false);
  const [useLocation, setUseLocation] = useState(true);

  const saveSettings = () => {
    // In a real app, we would save these settings
    // Then navigate back to the weather screen
    navigation.goBack();
  };

  return (
    <SafeAreaView style={styles.container}>
      <View style={styles.settingContainer}>
        <Text style={styles.settingLabel}>Use Celsius</Text>
        <Switch value={useCelsius} onValueChange={setUseCelsius} />
      </View>

      <View style={styles.settingContainer}>
        <Text style={styles.settingLabel}>Use Current Location</Text>
        <Switch value={useLocation} onValueChange={setUseLocation} />
      </View>

      <TouchableOpacity style={styles.saveButton} onPress={saveSettings}>
        <Text style={styles.saveButtonText}>Save Settings</Text>
      </TouchableOpacity>
    </SafeAreaView>
  );
}

const styles = StyleSheet.create({
  container: { flex: 1, padding: 20, backgroundColor: "#f5f5f5" },
  settingContainer: {
    flexDirection: "row",
    justifyContent: "space-between",
    alignItems: "center",
    paddingVertical: 15,
    borderBottomWidth: 1,
    borderBottomColor: "#ddd",
  },
  settingLabel: { fontSize: 18 },
  saveButton: {
    backgroundColor: "#4285F4",
    padding: 15,
    borderRadius: 5,
    alignItems: "center",
    marginTop: 30,
  },
  saveButtonText: { color: "white", fontSize: 16, fontWeight: "bold" },
});
Adding interactivity and navigation
Now that we have our basic screens, let's implement navigation between them using React Navigation, the most popular navigation library for React Native.
First, install the required packages:
expo install @react-navigation/native @react-navigation/stack
expo install react-native-screens react-native-safe-area-context
Now, let's set up the navigation structure:
// App.js
import React from "react";
import { NavigationContainer } from "@react-navigation/native";
import { createStackNavigator } from "@react-navigation/stack";
import { TouchableOpacity, Text } from "react-native";

import WeatherScreen from "./screens/WeatherScreen";
import SettingsScreen from "./screens/SettingsScreen";

const Stack = createStackNavigator();

export default function App() {
  return (
    <NavigationContainer>
      <Stack.Navigator initialRouteName="Weather">
        <Stack.Screen
          name="Weather"
          component={WeatherScreen}
          options={({ navigation }) => ({
            title: "Weather",
            headerRight: () => (
              <TouchableOpacity
                onPress={() => navigation.navigate("Settings")}
                style={{ marginRight: 15 }}
              >
                <Text>Settings</Text>
              </TouchableOpacity>
            ),
          })}
        />
        <Stack.Screen
          name="Settings"
          component={SettingsScreen}
          options={{ title: "Settings" }}
        />
      </Stack.Navigator>
    </NavigationContainer>
  );
}
This setup creates a stack navigator with two screens: Weather and Settings. The Weather screen includes a header button that navigates to the Settings screen.
To navigate between screens, we use the navigation prop provided by React Navigation:
// To navigate to a screen:
navigation.navigate("ScreenName");

// To go back to the previous screen:
navigation.goBack();
To make our weather app interactive, let's update the WeatherScreen to fetch real weather data using the device's location:
// screens/WeatherScreen.js (updated with location and API)
import React, { useState, useEffect } from "react";
import {
  View,
  Text,
  StyleSheet,
  ActivityIndicator,
  TouchableOpacity,
  SafeAreaView,
} from "react-native";
import * as Location from "expo-location";

// First, install the location package:
// expo install expo-location

export default function WeatherScreen({ navigation }) {
  const [loading, setLoading] = useState(true);
  const [errorMsg, setErrorMsg] = useState(null);
  const [weatherData, setWeatherData] = useState(null);

  useEffect(() => {
    (async () => {
      try {
        // Ask for location permission
        let { status } = await Location.requestForegroundPermissionsAsync();
        if (status !== "granted") {
          setErrorMsg("Permission to access location was denied");
          setLoading(false);
          return;
        }

        // Get current position
        let location = await Location.getCurrentPositionAsync({});
        const { latitude, longitude } = location.coords;

        // Fetch weather data (replace with your API key)
        const apiKey = "YOUR_WEATHER_API_KEY";
        const response = await fetch(
          `https://api.openweathermap.org/data/2.5/weather?lat=${latitude}&lon=${longitude}&units=imperial&appid=${apiKey}`,
        );

        const result = await response.json();

        setWeatherData({
          location: result.name,
          temperature: Math.round(result.main.temp),
          condition: result.weather[0].main,
          humidity: result.main.humidity,
        });
      } catch (error) {
        setErrorMsg("Error fetching weather data");
        console.error(error);
      } finally {
        setLoading(false);
      }
    })();
  }, []);

  if (loading) {
    return (
      <View style={styles.loadingContainer}>
        <ActivityIndicator size="large" color="#0000ff" />
        <Text style={styles.loadingText}>Loading weather data...</Text>
      </View>
    );
  }

  if (errorMsg) {
    return (
      <View style={styles.errorContainer}>
        <Text style={styles.errorText}>{errorMsg}</Text>
        <TouchableOpacity
          style={styles.retryButton}
          onPress={() => navigation.replace("Weather")}
        >
          <Text style={styles.retryButtonText}>Retry</Text>
        </TouchableOpacity>
      </View>
    );
  }

  return (
    <SafeAreaView style={styles.container}>
      <View style={styles.weatherContainer}>
        <Text style={styles.location}>{weatherData.location}</Text>
        <Text style={styles.temperature}>{weatherData.temperature}°F</Text>
        <Text style={styles.condition}>{weatherData.condition}</Text>
        <View style={styles.detailsContainer}>
          <Text style={styles.detailsText}>
            Humidity: {weatherData.humidity}%
          </Text>
        </View>
      </View>
    </SafeAreaView>
  );
}

// Add these new styles:
const styles = StyleSheet.create({
  // ... previous styles ...
  errorContainer: {
    flex: 1,
    justifyContent: "center",
    alignItems: "center",
    padding: 20,
  },
  errorText: {
    fontSize: 18,
    color: "red",
    textAlign: "center",
    marginBottom: 20,
  },
  retryButton: {
    backgroundColor: "#4285F4",
    padding: 15,
    borderRadius: 5,
  },
  retryButtonText: {
    color: "white",
    fontSize: 16,
  },
});
This updated version demonstrates several important concepts:
- Accessing Device Features: Using Expo's Location API to get the device's current location
- Handling Permissions: Requesting and handling permission to access device features
- API Integration: Fetching data from a third-party API (OpenWeatherMap in this case)
- Error Handling: Displaying user-friendly error messages and providing retry functionality
With these components in place, we've built a simple but functional weather app that demonstrates the key aspects of mobile app development with Expo React Native. This example shows how web developers can leverage their existing JavaScript and React knowledge while adapting to mobile-specific patterns and APIs.
For more advanced functionality like state management across your app, you might want to implement solutions like Redux or Context API. If you're building a more complex app, consider using TurboStarter Mobile Kit which comes with state management, authentication, and other essential features pre-configured.
Understanding React Native components for web developers
For web developers transitioning to React Native, understanding the component model is crucial. While React Native uses the same component-based architecture as React for web, there are significant differences in the available components and how they behave.
From <div> to <View> - mapping web concepts to mobile
In web development, you use HTML elements like <div>, <span>, and <p> to structure your content. React Native replaces these with platform-native components that render to their respective native UI elements.
Here's a comparison chart of common web elements and their React Native equivalents:
| Web HTML Element | React Native Component | Description |
|---|---|---|
<div> | <View> | A container component for other components |
<span>, <p>, <h1>-<h6> | <Text> | For displaying text (all text must be inside a Text component) |
<img> | <Image> | For displaying images (requires width and height) |
<input type="text"> | <TextInput> | For text input fields |
<button> | <Button>, <TouchableOpacity> | For handling user taps |
<ul>, <ol> | <FlatList>, <SectionList> | For rendering lists of data |
<a> | <Pressable> with navigation | For navigation between screens |
<form> | No direct equivalent | Forms are composed of individual inputs |
<table> | No direct equivalent | Tables can be created using nested Views |
A key difference in React Native is that all text must be wrapped in a <Text> component. You cannot place text directly inside a <View> as you would with a <div> in web development.
Let's see how a simple login form would be implemented in both web React and React Native:
// Web React
function LoginForm() {
  return (
    <div className="login-container">
      <h2>Login</h2>
      <form onSubmit={handleSubmit}>
        <div className="form-group">
          <label htmlFor="email">Email</label>
          <input
            type="email"
            id="email"
            value={email}
            onChange={(e) => setEmail(e.target.value)}
          />
        </div>
        <div className="form-group">
          <label htmlFor="password">Password</label>
          <input
            type="password"
            id="password"
            value={password}
            onChange={(e) => setPassword(e.target.value)}
          />
        </div>
        <button type="submit">Login</button>
      </form>
    </div>
  );
}
// React Native
function LoginForm() {
return (
<View style={styles.loginContainer}>
<Text style={styles.heading}>Login</Text>
<View style={styles.formGroup}>
<Text style={styles.label}>Email</Text>
<TextInput
style={styles.input}
value={email}
onChangeText={setEmail}
keyboardType="email-address"
autoCapitalize="none"
/>
</View>
<View style={styles.formGroup}>
<Text style={styles.label}>Password</Text>
<TextInput
style={styles.input}
value={password}
onChangeText={setPassword}
secureTextEntry
/>
</View>
<TouchableOpacity
style={styles.button}
onPress={handleSubmit}
>
<Text style={styles.buttonText}>Login</Text>
</TouchableOpacity>
</View>
);
}
const styles = StyleSheet.create({
loginContainer: { padding: 20 },
heading: { fontSize: 24, fontWeight: 'bold', marginBottom: 20 },
formGroup: { marginBottom: 15 },
label: { fontSize: 16, marginBottom: 5 },
input: {
borderWidth: 1,
borderColor: '#ddd',
padding: 10,
borderRadius: 5,
fontSize: 16,
},
button: {
backgroundColor: 'blue',
padding: 15,
borderRadius: 5,
alignItems: 'center',
},
buttonText: {
color: 'white',
fontSize: 16,
fontWeight: 'bold',
},
});
The key differences to note:
- In React Native, we use
<View>instead of<div>for containers - Text elements must be wrapped in
<Text>components - Input handling uses
onChangeTextinstead ofonChange - There's no form element; we handle submission with a touchable component
- Styling is applied using StyleSheet objects, not CSS classes
To get started faster, consider using the TurboStarter Mobile Kit which includes pre-built UI components that follow best practices for mobile interfaces.
Container components in React Native
React Native provides several specialized container components that serve different purposes:
View: The most basic container component, similar to a div in web development. It supports flexbox layout, style, some touch handling, and accessibility controls.
<View style={styles.container}>
  <Text>Content goes here</Text>
</View>ScrollView: A scrollable container that can contain multiple components and views.
<ScrollView style={styles.scrollContainer}>
  {/* Many components can go here */}
  <Text>Scroll me!</Text>
  <Image source={require("./image.png")} />
  <Text>Keep scrolling...</Text>
</ScrollView>FlatList: An efficient container for rendering large lists of data that only renders items currently visible on screen.
<FlatList
  data={[
    { id: "1", title: "Item 1" },
    { id: "2", title: "Item 2" },
    // many more items...
  ]}
  renderItem={({ item }) => <Text>{item.title}</Text>}
  keyExtractor={(item) => item.id}
/>SafeAreaView: A container that automatically adds padding to ensure content is visible and not obscured by device-specific features like the notch on iPhones.
<SafeAreaView style={styles.container}>
  <Text>This content respects the safe area</Text>
</SafeAreaView>
Styling in React Native vs. CSS
Styling in React Native differs significantly from traditional web CSS. Instead of using stylesheets with class selectors, React Native uses JavaScript objects to define styles, which are then applied directly to components.
Key differences between React Native styling and CSS:
-
Style Properties: React Native uses camelCase for properties (e.g.,
backgroundColorinstead ofbackground-color) -
No CSS Selectors: There's no concept of selectors or cascading; styles are applied directly to components
-
No Inheritance: Most styles do not automatically inherit from parent components (except for some text properties within
<Text>components) -
Units: React Native uses unitless numbers for dimensions (they represent density-independent pixels)
-
Flexbox Default: React Native uses Flexbox for layout by default, with some differences from web implementations
Here's how you create and apply styles in React Native:
import { StyleSheet, View, Text } from "react-native";

export default function StyledComponent() {
  return (
    <View style={styles.container}>
      <Text style={styles.title}>Hello, React Native!</Text>
      <Text style={styles.subtitle}>Styling with JavaScript</Text>

      {/* You can combine styles */}
      <Text style={[styles.text, styles.highlighted]}>
        This text has multiple styles
      </Text>

      {/* Or apply inline styles */}
      <View
        style={{
          padding: 10,
          backgroundColor: "lightblue",
          marginTop: 10,
        }}
      >
        <Text>Inline styled component</Text>
      </View>
    </View>
  );
}

// Define styles using StyleSheet.create
const styles = StyleSheet.create({
  container: {
    flex: 1,
    padding: 20,
    backgroundColor: "#fff",
  },
  title: {
    fontSize: 24,
    fontWeight: "bold",
    marginBottom: 10,
  },
  subtitle: {
    fontSize: 18,
    color: "gray",
    marginBottom: 20,
  },
  text: {
    fontSize: 16,
    lineHeight: 24,
  },
  highlighted: {
    backgroundColor: "yellow",
    padding: 5,
    borderRadius: 3,
  },
});
Using StyleSheet.create() is recommended over inline styles because it:
- Validates style properties at compile time
- Optimizes styles by converting them to native code
- Improves readability by separating styles from component logic
Flexbox in React Native
React Native uses Flexbox for layout, which will be familiar to web developers, but with some important differences:
-
Default flex direction: In React Native, the default
flexDirectioniscolumn(notrowas in web CSS) -
flex property: The
flexproperty works differently; a positive number defines the proportion of space an element should take -
Available properties: Some flexbox properties from web CSS are not available in React Native
Here's an example of a common layout pattern using flexbox in React Native:
import { View, Text, StyleSheet } from "react-native";

export default function FlexboxLayout() {
  return (
    <View style={styles.container}>
      <View style={styles.header}>
        <Text style={styles.headerText}>Header</Text>
      </View>

      <View style={styles.content}>
        <View style={styles.sidebar}>
          <Text>Sidebar</Text>
        </View>
        <View style={styles.mainContent}>
          <Text>Main Content</Text>
        </View>
      </View>

      <View style={styles.footer}>
        <Text>Footer</Text>
      </View>
    </View>
  );
}

const styles = StyleSheet.create({
  container: {
    flex: 1, // Take up all available space
  },
  header: {
    height: 60,
    backgroundColor: "#f0f0f0",
    justifyContent: "center",
    alignItems: "center",
  },
  headerText: {
    fontSize: 18,
    fontWeight: "bold",
  },
  content: {
    flex: 1, // Take up all available space between header and footer
    flexDirection: "row", // Arrange children horizontally
  },
  sidebar: {
    width: 100,
    backgroundColor: "#e0e0e0",
    padding: 10,
  },
  mainContent: {
    flex: 1, // Take up remaining space
    backgroundColor: "#ffffff",
    padding: 10,
  },
  footer: {
    height: 50,
    backgroundColor: "#f0f0f0",
    justifyContent: "center",
    alignItems: "center",
  },
});
This layout creates a classic sidebar design with a fixed-height header and footer and a flexible content area. The content area uses row direction to place a fixed-width sidebar next to a flexible main content area.
Best practices for converting web apps to React Native
Converting an existing web application to React Native requires a strategic approach that balances code reuse with platform-specific optimizations. While Expo React Native makes this process more straightforward, there are several best practices to follow for a successful conversion.
Reusing business logic across platforms
One of the greatest advantages of using React Native for web developers is the ability to reuse significant portions of your business logic across platforms. Here's how to maximize code sharing:
1. Separate UI from logic with a clean architecture
Organize your code using a pattern like Model-View-Controller (MVC) or a more modern approach like the Container/Presenter pattern:
src/
├── api/              # API clients and data fetching
├── components/       # Presentational components (platform-specific)
├── hooks/            # Custom React hooks (shared)
├── navigation/       # Navigation configuration (platform-specific)
├── screens/          # Screen components (platform-specific)
├── services/         # Business logic services (shared)
├── store/            # State management (shared)
└── utils/            # Utility functions (shared)
2. Create platform-agnostic services
Build service layers that handle business logic, data transformation, and API interactions independently of the UI:
// services/authService.js - Shared across platforms
export async function loginUser(email, password) {
  try {
    const response = await apiClient.post("/auth/login", { email, password });
    return {
      success: true,
      user: response.data.user,
      token: response.data.token,
    };
  } catch (error) {
    return {
      success: false,
      error: error.response?.data?.message || "Login failed",
    };
  }
}

// Can be used in both web and mobile:
import { loginUser } from "../services/authService";

// In a React component
const handleLogin = async () => {
  const result = await loginUser(email, password);
  if (result.success) {
    // Handle successful login
  } else {
    // Handle error
  }
};
3. Use shared validation logic
Form validation logic can often be shared between web and mobile applications:
// utils/validators.js - Shared across platforms
export const emailValidator = (email) => {
  const emailRegex = /^[^\s@]+@[^\s@]+\.[^\s@]+$/;
  if (!email) return "Email is required";
  if (!emailRegex.test(email)) return "Invalid email format";
  return null;
};

export const passwordValidator = (password) => {
  if (!password) return "Password is required";
  if (password.length < 8) return "Password must be at least 8 characters";
  return null;
};

// Used in both web and mobile forms
import { emailValidator, passwordValidator } from "../utils/validators";

// In a form component
const validateForm = () => {
  const emailError = emailValidator(email);
  const passwordError = passwordValidator(password);

  setErrors({ email: emailError, password: passwordError });
  return !emailError && !passwordError;
};
4. Implement platform-specific adapters when needed
For functionality that must be implemented differently across platforms, use adapter patterns:
// storage/index.js - Platform detection and export
import * as webStorage from "./webStorage";
import * as mobileStorage from "./mobileStorage";
import { Platform } from "react-native";

// Export the appropriate implementation based on platform
export const storage = Platform.OS === "web" ? webStorage : mobileStorage;

// Used the same way across platforms
import { storage } from "../storage";

// Later in code
await storage.setItem("user", JSON.stringify(userData));
const savedUser = JSON.parse(await storage.getItem("user"));
For enhancing your development productivity with AI assistance, check out our guide on best practices for Cursor AI to build your startup 10x faster.
Adapting UI/UX for mobile contexts
While business logic can often be shared, user interfaces typically need significant adaptation for mobile contexts. Here are best practices for creating effective mobile UIs based on web applications:
1. Rethink navigation patterns
Web applications often use sidebar navigation or complex menu structures that don't translate well to mobile:
- Horizontal navigation bars - Sidebar menus - Dropdown menus - Breadcrumb navigation - Tab interfaces
- Bottom tab navigation - Stack navigation (push/pop screens) - Drawer navigation (slide in from edge) - Modal screens - Gesture-based navigation
Convert your web navigation to a mobile-appropriate pattern using React Navigation:
// For a web app with a sidebar and top navigation
import { createBottomTabNavigator } from "@react-navigation/bottom-tabs";
import { createStackNavigator } from "@react-navigation/stack";

const Tab = createBottomTabNavigator();
const Stack = createStackNavigator();

// Convert top-level sidebar navigation to bottom tabs
function MainTabs() {
  return (
    <Tab.Navigator>
      <Tab.Screen name="Home" component={HomeScreen} />
      <Tab.Screen name="Profile" component={ProfileScreen} />
      <Tab.Screen name="Settings" component={SettingsScreen} />
    </Tab.Navigator>
  );
}

// Use stack navigation for drill-down flows
function App() {
  return (
    <NavigationContainer>
      <Stack.Navigator>
        <Stack.Screen
          name="Main"
          component={MainTabs}
          options={{ headerShown: false }}
        />
        <Stack.Screen name="Details" component={DetailsScreen} />
        <Stack.Screen name="EditProfile" component={EditProfileScreen} />
      </Stack.Navigator>
    </NavigationContainer>
  );
}
2. Adjust touch targets for fingers
Web interfaces designed for mouse pointers need larger touch targets for finger interaction:
- Make buttons at least 44×44 points (Apple's recommendation)
- Increase spacing between interactive elements
- Replace hover states with press states
// Web button (too small for mobile)
<button className="web-button">Click Me</button>

// Converted to React Native
<TouchableOpacity
  style={styles.button}
  onPress={handlePress}
>
  <Text style={styles.buttonText}>Tap Me</Text>
</TouchableOpacity>

const styles = StyleSheet.create({
  button: {
    backgroundColor: 'blue',
    padding: 15,          // More padding for larger touch target
    borderRadius: 5,
    minHeight: 44,        // Minimum height for touch target
    justifyContent: 'center',
    alignItems: 'center',
    marginVertical: 10,   // Increased spacing between elements
  },
  buttonText: {
    color: 'white',
    fontSize: 16,
  },
});
3. Simplify forms and inputs
Mobile forms should be simpler and more focused than their web counterparts:
- Break long forms into steps or screens
- Use appropriate keyboard types for different inputs
- Implement auto-advance between fields
- Show/hide password visibility toggles
Web forms with multiple fields should be reorganized for mobile:
// Mobile approach: Break into multiple screens
function PersonalInfoScreen({ navigation }) {
  // Step 1: Basic info
  return (
    <View style={styles.container}>
      <TextInput
        placeholder="Name"
        style={styles.input}
        returnKeyType="next"
        onSubmitEditing={() => emailRef.current.focus()}
      />
      <TextInput
        ref={emailRef}
        placeholder="Email"
        keyboardType="email-address"
        autoCapitalize="none"
        style={styles.input}
        returnKeyType="next"
        onSubmitEditing={() => passwordRef.current.focus()}
      />
      <TextInput
        ref={passwordRef}
        placeholder="Password"
        secureTextEntry
        style={styles.input}
        returnKeyType="done"
        onSubmitEditing={() => navigation.navigate("AddressInfo")}
      />
      <TouchableOpacity
        style={styles.button}
        onPress={() => navigation.navigate("AddressInfo")}
      >
        <Text style={styles.buttonText}>Next</Text>
      </TouchableOpacity>
    </View>
  );
}
For more insights on streamlining your development process, check out our guide on how to get started with Turborepo CLI and ship your project to production in seconds.
Working with native device features in Expo React Native
One of the most powerful aspects of Expo React Native is how it simplifies access to native device features. Instead of writing platform-specific native code, Expo provides a unified JavaScript API that works across iOS and Android. This makes it easy for web developers to incorporate sophisticated native functionality into their apps.
Accessing device sensors and hardware
Expo provides a comprehensive set of APIs for accessing various device sensors and hardware features. Let's explore some of the most commonly used ones with practical examples:
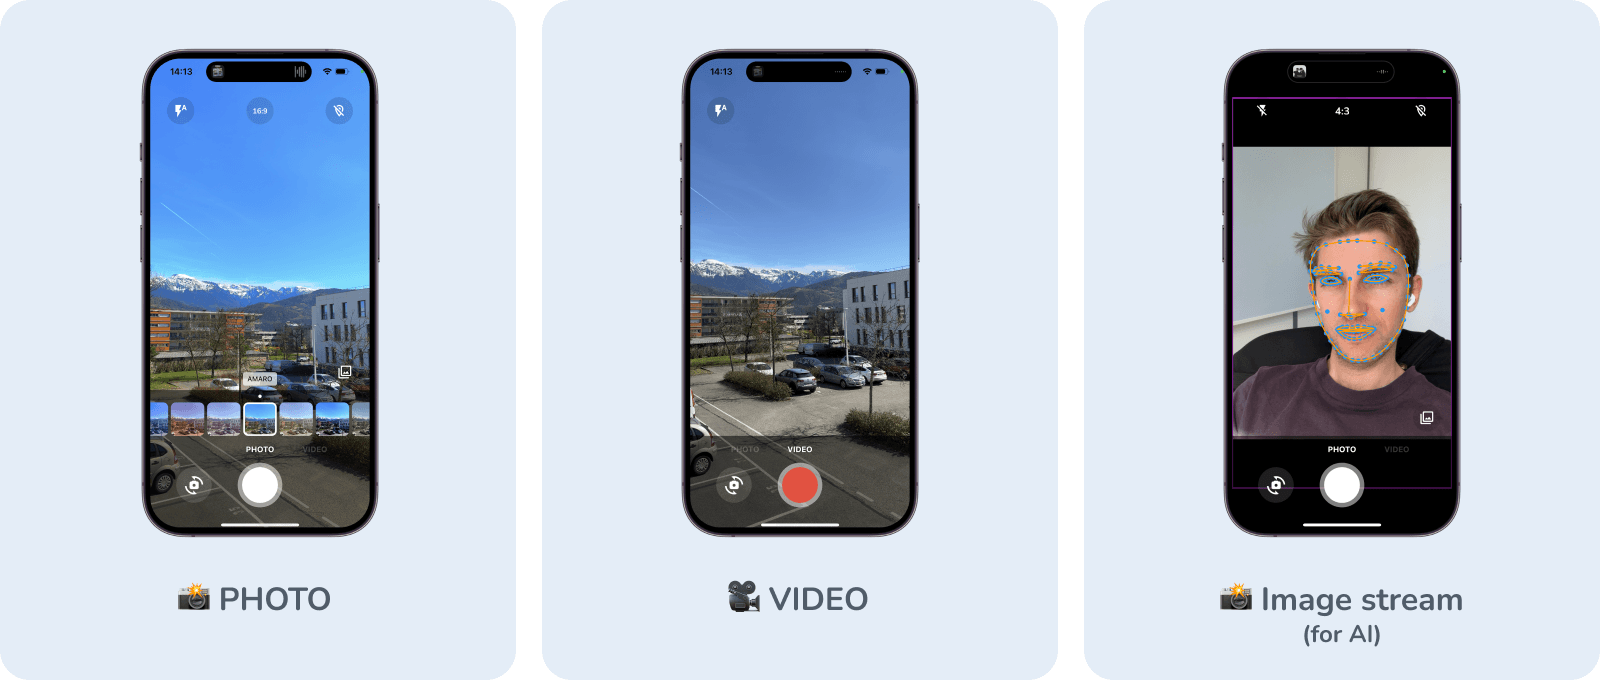
Camera
The Expo Camera module provides a React component that renders a camera preview and gives you access to take photos, record videos, and more.
First, install the camera package:
expo install expo-cameraThen, implement a basic camera component:
import React, { useState, useEffect, useRef } from "react";
import { View, Text, TouchableOpacity, StyleSheet } from "react-native";
import { Camera } from "expo-camera";

export default function CameraScreen() {
  const [hasPermission, setHasPermission] = useState(null);
  const [cameraType, setCameraType] = useState(Camera.Constants.Type.back);
  const cameraRef = useRef(null);

  useEffect(() => {
    (async () => {
      const { status } = await Camera.requestCameraPermissionsAsync();
      setHasPermission(status === "granted");
    })();
  }, []);

  const takePicture = async () => {
    if (cameraRef.current) {
      const photo = await cameraRef.current.takePictureAsync();
      console.log("Photo taken:", photo.uri);
      // Here you could navigate to a preview screen
      // or upload the photo to your server
    }
  };

  // Toggle between front and back camera
  const toggleCameraType = () => {
    setCameraType(
      cameraType === Camera.Constants.Type.back
        ? Camera.Constants.Type.front
        : Camera.Constants.Type.back,
    );
  };

  // Render permission and camera UI
  // (shortened for brevity)
  return (
    <View style={styles.container}>
      <Camera ref={cameraRef} style={styles.camera} type={cameraType}>
        <View style={styles.buttonContainer}>
          <TouchableOpacity style={styles.button} onPress={toggleCameraType}>
            <Text style={styles.text}>Flip</Text>
          </TouchableOpacity>
          <TouchableOpacity style={styles.button} onPress={takePicture}>
            <Text style={styles.text}>Take Photo</Text>
          </TouchableOpacity>
        </View>
      </Camera>
    </View>
  );
}
Geolocation
Expo's Location API allows you to access the device's GPS and get the current position:
expo install expo-locationHere's how to implement location functionality:
import React, { useState, useEffect } from "react";
import { View, Text, StyleSheet, ActivityIndicator } from "react-native";
import * as Location from "expo-location";
import MapView, { Marker } from "react-native-maps";

export default function LocationScreen() {
  const [location, setLocation] = useState(null);
  const [errorMsg, setErrorMsg] = useState(null);
  const [loading, setLoading] = useState(true);

  useEffect(() => {
    (async () => {
      try {
        // Ask for permission
        const { status } = await Location.requestForegroundPermissionsAsync();
        if (status !== "granted") {
          setErrorMsg("Permission to access location was denied");
          setLoading(false);
          return;
        }

        // Get current position
        const location = await Location.getCurrentPositionAsync({
          accuracy: Location.Accuracy.Highest,
        });

        setLocation(location);
      } catch (error) {
        setErrorMsg("Could not get location: " + error.message);
      } finally {
        setLoading(false);
      }
    })();
  }, []);

  // Render location UI with map (shortened for brevity)
  return (
    <View style={styles.container}>
      {location && (
        <MapView
          style={styles.map}
          initialRegion={{
            latitude: location.coords.latitude,
            longitude: location.coords.longitude,
            latitudeDelta: 0.0922,
            longitudeDelta: 0.0421,
          }}
        >
          <Marker
            coordinate={{
              latitude: location.coords.latitude,
              longitude: location.coords.longitude,
            }}
            title="You are here"
          />
        </MapView>
      )}
    </View>
  );
}
Push notifications and device communication
Push notifications are a crucial part of mobile applications, allowing you to engage users even when they're not actively using your app. Expo simplifies the implementation of push notifications across both iOS and Android platforms.
To implement push notifications with Expo:
expo install expo-notificationsBasic notification setup:
import React, { useState, useEffect, useRef } from "react";
import { Text, View, Button, Platform } from "react-native";
import * as Notifications from "expo-notifications";
import * as Device from "expo-device";

// Configure notification handler
Notifications.setNotificationHandler({
  handleNotification: async () => ({
    shouldShowAlert: true,
    shouldPlaySound: true,
    shouldSetBadge: false,
  }),
});

export default function NotificationsScreen() {
  const [expoPushToken, setExpoPushToken] = useState("");

  useEffect(() => {
    // Register for push notifications
    registerForPushNotificationsAsync().then((token) =>
      setExpoPushToken(token),
    );

    // Set up notification listeners (implementation shortened)
  }, []);

  // Send a test notification
  const sendNotification = async () => {
    await Notifications.scheduleNotificationAsync({
      content: {
        title: "You've got a notification!",
        body: "This is a test notification from your Expo app.",
        data: { data: "Custom data goes here" },
      },
      trigger: { seconds: 2 },
    });
  };

  return (
    <View style={styles.container}>
      <Text>Your Expo Push Token: {expoPushToken}</Text>
      <Button title="Send Test Notification" onPress={sendNotification} />
    </View>
  );
}

// Registration function implementation (shortened)
For information on integrating your Expo app with backend services, check out our guide on how to connect your TurboStarter app to Supabase in 5 minutes, which covers authentication, database, and storage solutions.
Testing and deploying Expo React Native apps
Once you've built your Expo React Native app, it's time to test it thoroughly and deploy it to app stores. Expo provides tools that simplify both processes.
Testing your Expo React Native application
Manual testing with Expo Go
The simplest way to test your Expo app during development is using the Expo Go app:
- Run
expo startin your project directory - Scan the QR code with your device's camera (iOS) or the Expo Go app (Android)
- Test your app on real devices without building native binaries
This approach is ideal for rapid iteration and testing on different devices.
Automated testing with Jest and Testing Library
For more comprehensive testing, you can set up automated tests using Jest and React Native Testing Library:
npm install --save-dev jest @testing-library/react-native @testing-library/jest-nativeCreate a simple test:
// __tests__/Button.test.js
import React from "react";
import { render, fireEvent } from "@testing-library/react-native";
import CustomButton from "../components/CustomButton";

describe("CustomButton", () => {
  it("renders correctly", () => {
    const { getByText } = render(<CustomButton title="Press Me" />);
    expect(getByText("Press Me")).toBeTruthy();
  });

  it("calls onPress function when pressed", () => {
    const onPressMock = jest.fn();
    const { getByText } = render(
      <CustomButton title="Press Me" onPress={onPressMock} />,
    );

    fireEvent.press(getByText("Press Me"));
    expect(onPressMock).toHaveBeenCalledTimes(1);
  });
});
Deploying to app stores
Expo offers two approaches for deploying your app: the managed workflow with EAS Build and the bare workflow for more customization.
Using EAS Build for managed workflow
Expo Application Services (EAS) simplifies the process of building and submitting your app:
- Install the EAS CLI:
npm install -g eas-cli- Configure your project and build for different platforms:
eas login
eas build:configure
eas build --platform android  # For Android
eas build --platform ios      # For iOS
EAS Build handles the entire build process in the cloud, including signing and providing ready-to-submit binaries.
Submitting to app stores
After building your app, you can submit it to the app stores:
eas submit --platform ios     # For iOS App Store
eas submit --platform android # For Google Play Store
Updating your app with OTA updates
One of the most powerful features of Expo is over-the-air updates, which allow you to push updates without going through the app store review process:
expo publishThis command bundles your JavaScript code and assets and uploads them to Expo's servers. Users with the latest version of your app will automatically download and apply these updates the next time they open the app.
For advanced deployment strategies for your full application stack, you might want to explore full guide on publishing your Expo app to stores.
Conclusion - building successful mobile apps as a web developer
Expo React Native offers web developers a powerful bridge to the world of mobile app development. By leveraging your existing JavaScript and React skills, you can create high-quality native mobile applications without having to learn platform-specific languages and tools.
Key takeaways for web developers
- Start with what you know: Begin with your JavaScript and React knowledge as a foundation
- Embrace mobile paradigms: Understand mobile-specific design patterns and user expectations
- Utilize Expo's ecosystem: Take advantage of Expo's comprehensive toolset for development, testing, and deployment
- Implement platform-specific adaptations when needed: Use conditional code to optimize for each platform
- Choose the right workflow: Start with the managed workflow for simplicity, then consider ejecting when necessary
Next steps in your Expo React Native journey
To continue growing your skills with Expo React Native:
- Explore the Expo documentation: The official Expo docs provide comprehensive guides and API references
- Join the Expo community: Participate in forums, Discord channels, and GitHub discussions
- Build real projects: Apply your knowledge by building and publishing your own apps
- Stay updated: Follow Expo releases and React Native advancements
- Join our community: Connect with fellow mobile developers in our exclusive Discord community for indie hackers
By following these practices and continually improving your skills, you can successfully transition from web development to creating native mobile applications that provide excellent user experiences across platforms. The power of Expo React Native lies in making this transition as smooth as possible, allowing you to focus on creating great apps rather than wrestling with complex toolchains and platform-specific code.
For a complete production-ready solution that includes everything you need to build web, mobile, and extension applications in a monorepo structure, check out TurboStarter templates which combine the power of Expo React Native with other best-in-class tools and pre-built components.
Make your TypeScript smarter - with ONE line of code
Make TypeScript inference sharper with ts-reset. This one-line setup fixes built-in typings and improves type safety across your entire JavaScript monorepo.
30x faster linting and formatting - ESLint and Prettier replaced with OXC
TurboStarter replaces ESLint and Prettier with OXC's Rust toolchain, cutting lint and format times from minutes to seconds across the whole monorepo.