For the complete documentation index, see llms.txt. Prefer markdown by appending.mdto documentation URLs or sendingAccept: text/markdown.
Voice
Real-time voice agent demo with live audio sessions. See how listening, speaking, and tool calls work in a low-latency voice UI.
The Voice app is the most real-time part of TurboStarter AI. Instead of a request-response UI, it gives users a shared audio session with an agent that can listen, reason, speak back, and stream conversation state across web and mobile.
Capabilities
LiveKit gives this app more than a microphone button. It provides the realtime transport, room lifecycle, participant state, and media controls that make the experience feel like a proper call interface instead of a chat form with audio attached.
Why LiveKit?
LiveKit is a powerful realtime platform that provides the infrastructure for the voice app. It is used to transport the audio and video streams between the client and the server.
It is also used to store the session state and to control the media tracks. It powers millions of real-time voice and video sessions every day, including a ChatGPT Voice mode.
Web
On web, the app leans into the full browser surface area. The desktop experience is especially good for demos, internal copilots, sales assistants, and any workflow where screen sharing matters.
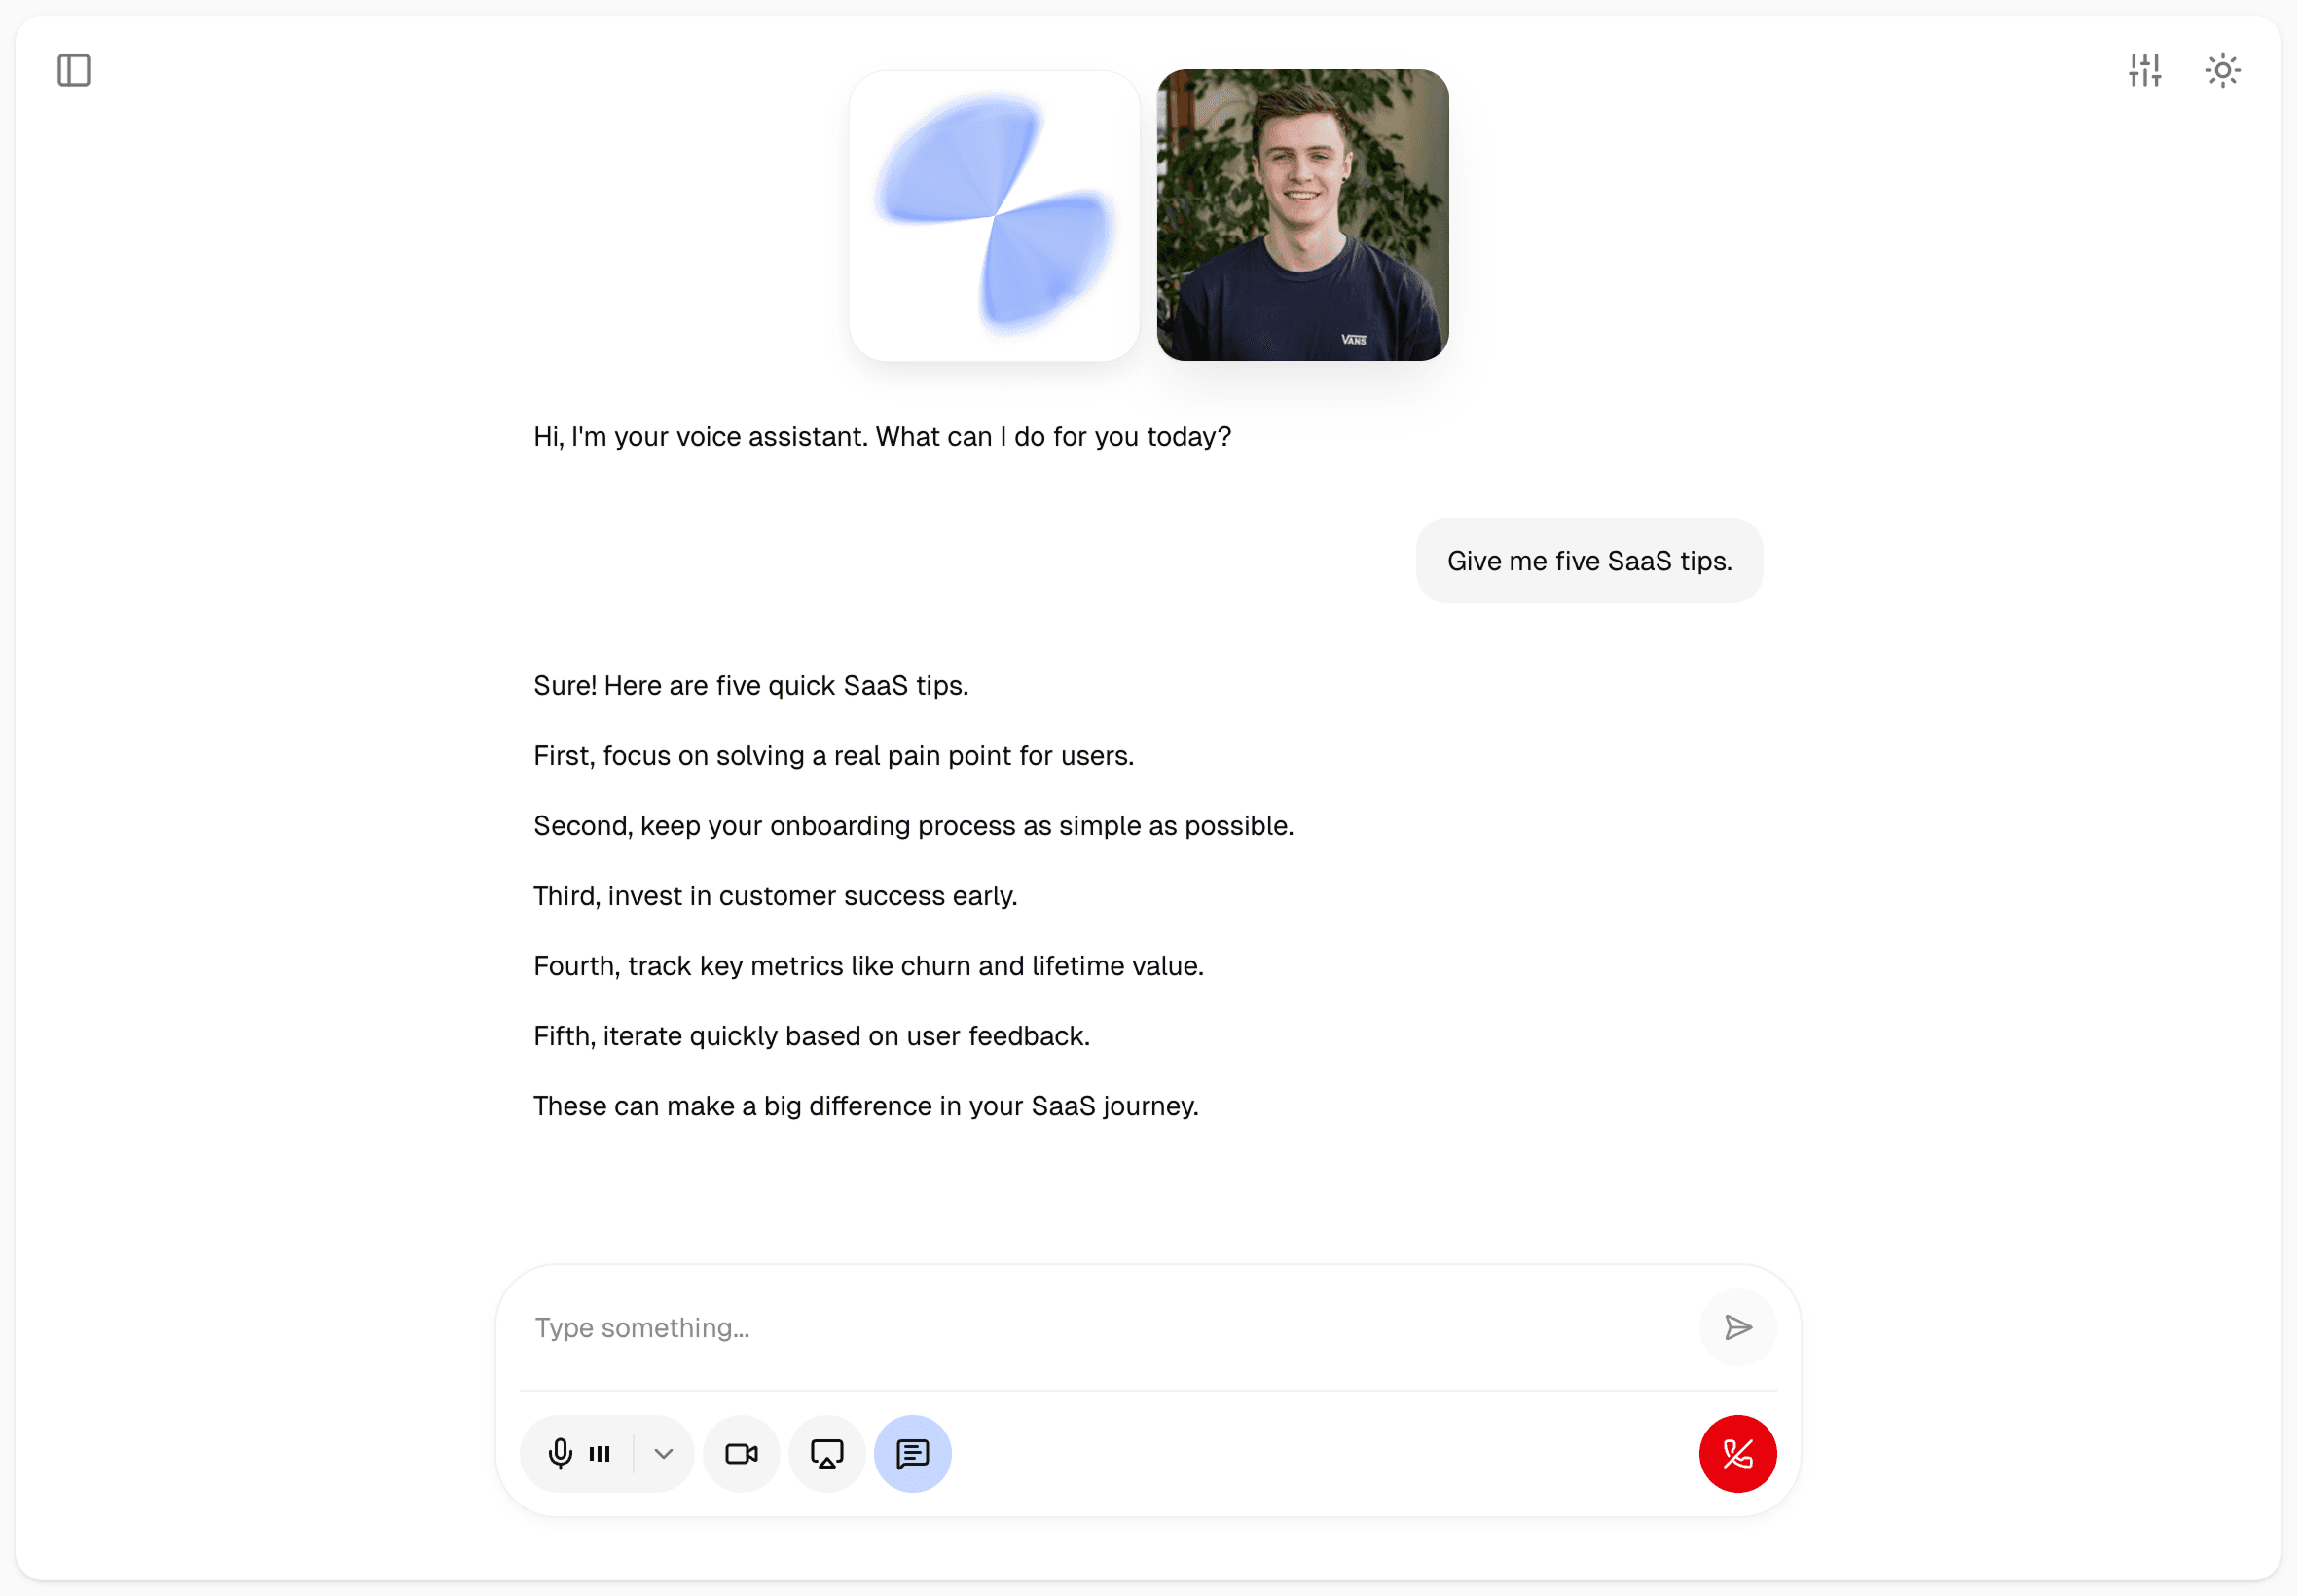
Realtime conversation UI
Users can start a session, interrupt naturally, and follow the conversation through a live transcript while the agent is speaking or listening.
Camera and screen sharing
The web client exposes microphone, camera, and screen-share controls, which makes it useful for support, onboarding, and collaborative assistant flows.
Visualizer and layout controls
The visualizer is customizable, and the layout adapts when transcript, camera, or screen-share tiles are active.
Browser-native testing surface
Web is the fastest place to test prompts, media permissions, interruptions, and room behavior while you are iterating on the agent.
Mobile
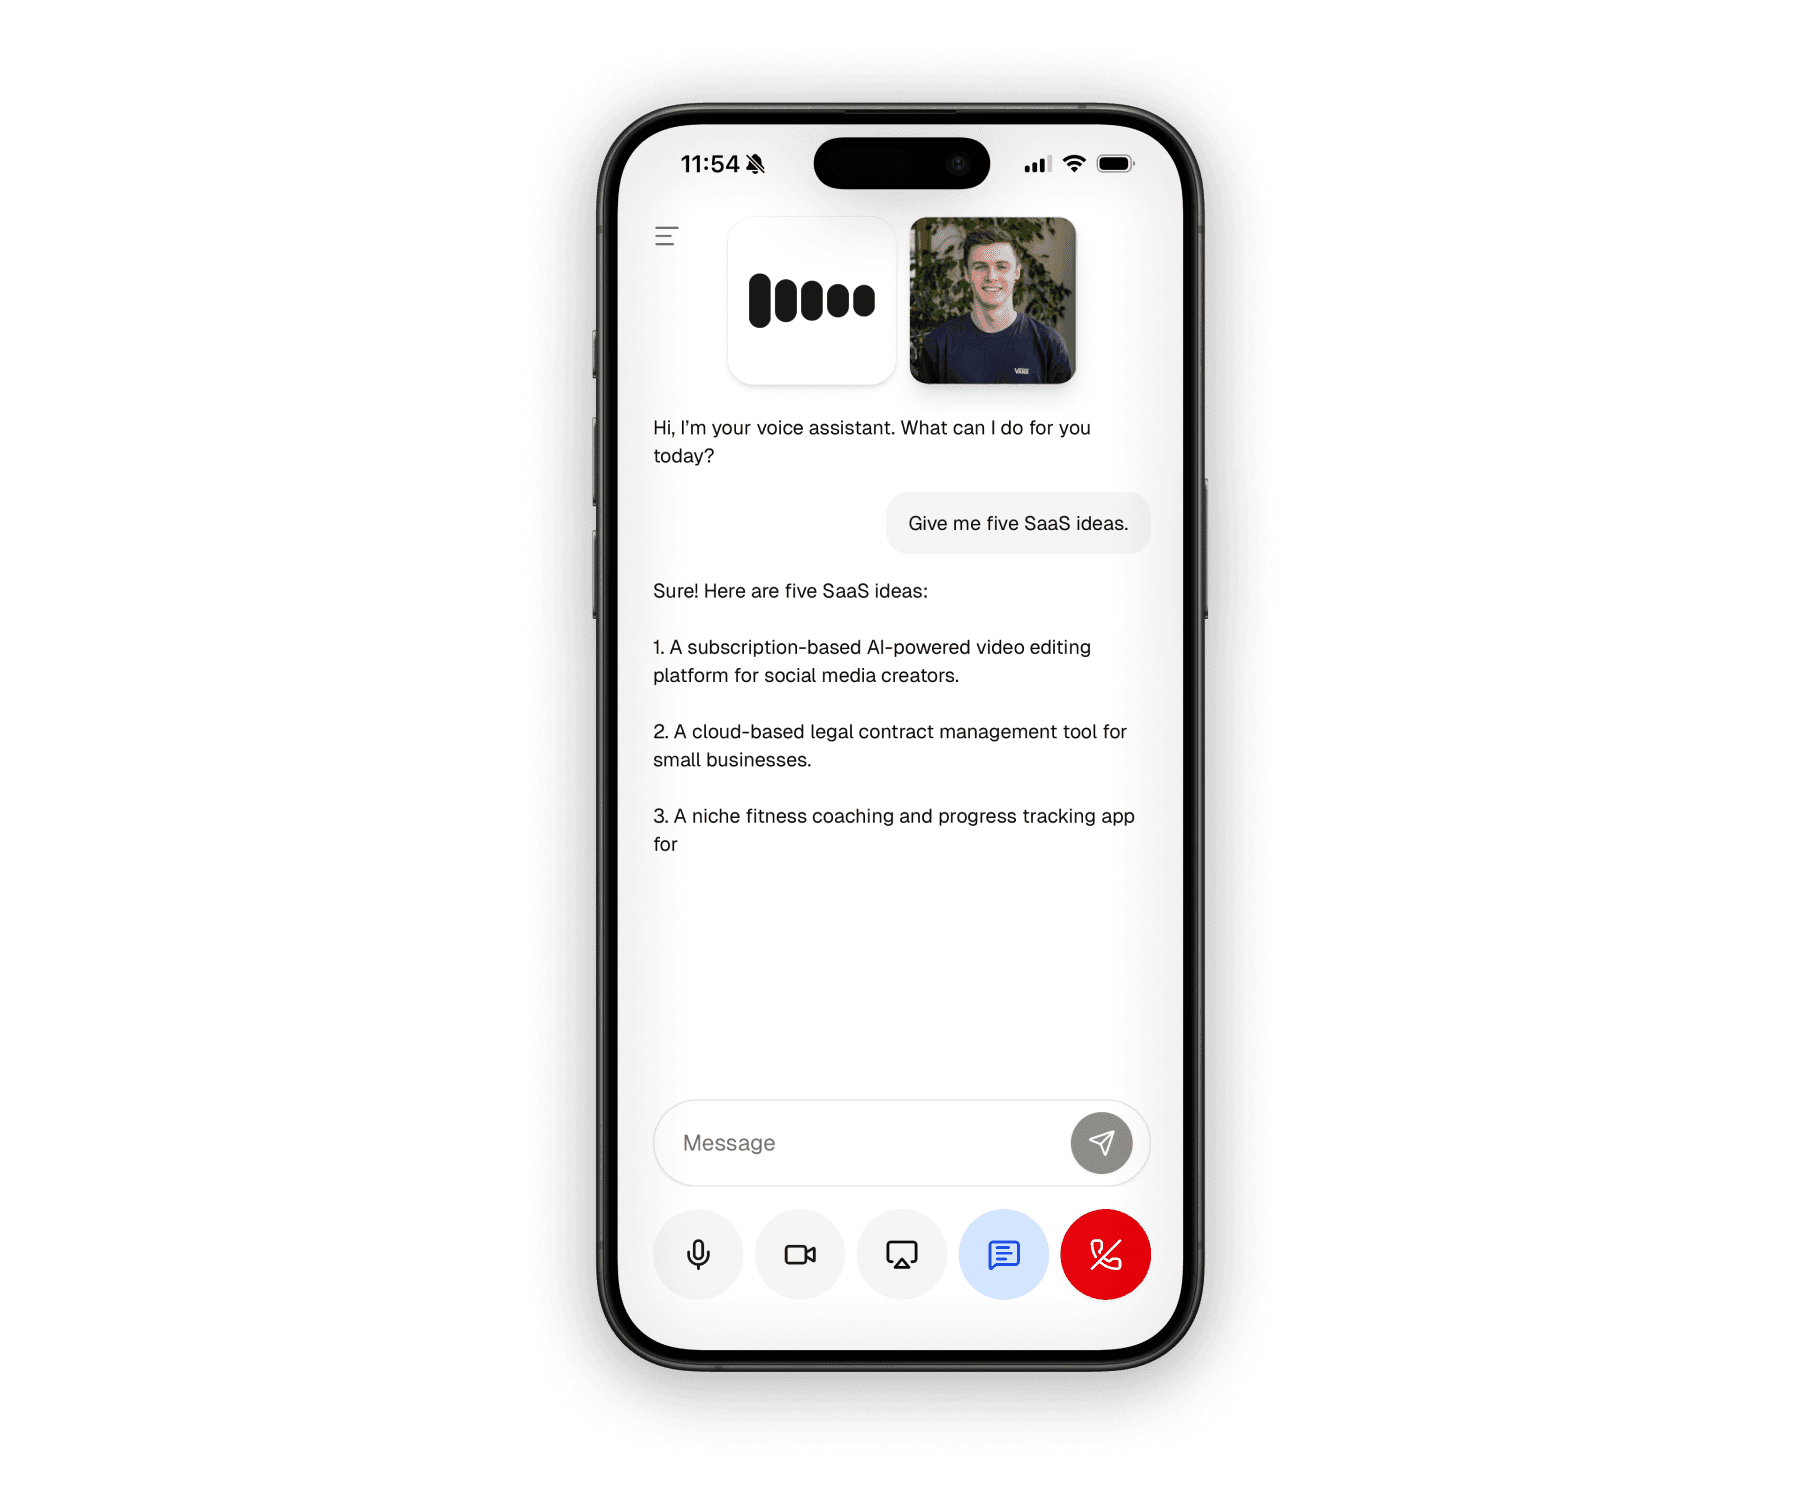
On mobile, the same LiveKit room and agent stack is presented through a native-first session layout. The experience is optimized for touch controls, safe areas, and audio-session handling on real devices.
Native audio session handling
The mobile app manages the underlying audio session so the voice experience behaves like a real call instead of a fragile media demo.
Transcript plus in-session chat
Users can keep the conversation voice-first while still opening transcript and chat surfaces when they want more control or visibility.
Camera and screen sharing
The mobile UI also supports microphone, camera, and screen-share controls, with a second media tile shown when visual tracks are active.
Shared backend, native UI
Both apps use the same voice backend and request lifecycle, while keeping the interaction model natural on phones and tablets.
Shared infrastructure
Under the UI differences, the architecture stays consistent across platforms. Both apps request a room token from the shared API layer, join a LiveKit room, and then hand the live session off to a LiveKit agent worker.
Shared request lifecycle
The web and mobile welcome screens trigger the same shared voice route
module in packages/api/src/modules/ai/voice.ts, so auth, credits, and
token creation stay centralized.
Shared voice package
The LiveKit token logic, environment handling, agent entrypoint, and
deployment assets all live in packages/ai/voice/src.
Live session transport
Session state, media tracks, transcript messages, and agent events are streamed over LiveKit instead of the text-streaming path used by the chat apps.
Architecture
The voice app still uses the same monorepo boundaries as the rest of the AI product. The difference is that the backend work happens around room creation and agent sessions rather than around a single streamed HTTP response.
- The user starts a session from the platform-specific voice UI in
src/modules/voice/**. - The shared API route module in
packages/api/src/modules/ai/voice.tsruns through the normal request lifecycle, including auth context and credit checks. - The token-creation logic in
packages/ai/voice/src/api.tscreates a short-lived LiveKit participant token and room configuration. - The web and mobile
SessionProviderimplementations use LiveKit's token source helpers to join the room. - The LiveKit agent worker defined in
packages/ai/voice/src/agent/main.tsjoins that room and drives the conversation.
This keeps the app aligned with the rest of the starter while still giving voice its own realtime transport and deployment model.
Voice architecture
The most useful mental model for this app is the classic voice pipeline: speech comes in, gets transcribed, passed to an LLM, and then rendered back to audio. LiveKit Agents supports that pattern directly, and it is the right baseline to understand before looking at realtime speech-to-speech models.
This is the recommended architecture to understand first because it gives you the most flexibility. You can mix providers for transcription, reasoning, and voice quality instead of accepting one provider's full stack.
import { AgentSession } from "@livekit/agents";

const session = new AgentSession({
  stt: "deepgram/nova-3:multi",
  llm: "openai/gpt-4.1-mini",
  tts: "cartesia/sonic-3:voice-id",
});
In the repository, this full pipeline is already scaffolded in
packages/ai/voice/src/agent/main.ts, along with turn detection, VAD, and
noise-cancellation hooks.
Realtime models are a strong alternative when you want a more tightly coupled speech-to-speech experience with fewer moving pieces in the app layer.
import { AgentSession } from "@livekit/agents";
import * as openai from "@livekit/agents-plugin-openai";

const session = new AgentSession({
  llm: new openai.realtime.RealtimeModel({ voice: "cedar" }),
});
This pattern is also supported by LiveKit and is useful when you want latency and expressiveness from a single realtime model. It is not the only option, though, and you can switch between the two approaches as your product needs evolve.
LiveKit's own docs present both approaches side by side, which is a helpful way to reason about tradeoffs: pipeline mode gives you finer provider control, while realtime mode gives you a more tightly integrated speech experience. See the Voice AI quickstart, turn handling guide, and realtime models overview.
STT and TTS provider options
One of the strengths of LiveKit Agents is that you are not locked into a single speech stack. You can mix and match providers based on latency, language coverage, cost, and voice quality.
| Capability | Common choices | Notes |
|---|---|---|
| STT | Deepgram, AssemblyAI, OpenAI, Google Cloud, Speechmatics | Deepgram is a common starting point for low-latency multilingual transcription, but LiveKit supports a wider plugin ecosystem. |
| TTS | Cartesia, ElevenLabs, Deepgram, OpenAI, Google Cloud, Rime | Cartesia and ElevenLabs are common picks when voice quality is the main product differentiator. |
| Realtime speech-to-speech | OpenAI Realtime, Gemini Live, xAI Grok Voice, Amazon Nova Sonic, Phonic | Realtime models reduce app-layer composition but change how you think about control and provider mix. |
If you are exploring the space, start with STT models, TTS models, and realtime models. For product-specific guidance inside this docs set, see Speech, Transcription, OpenAI, and ElevenLabs.
Create a project and set environment variables
The repository already knows how to build and run the voice agent, but you still need a LiveKit project to point it at. You can use LiveKit Cloud for the smoothest path, or run the LiveKit server locally when you want full control during development.
LiveKit Cloud is the easiest way to get from code to a working agent. It gives you hosted transport, agent deployment, observability, and the cloud dashboard in one place.
Create a project in the LiveKit Cloud dashboard.
Install the LiveKit CLI and link it to your account:
brew install livekit-cli
lk cloud auth
Add the LiveKit credentials to apps/web/.env.local, because the
@workspace/ai-voice package scripts load that file by default:
LIVEKIT_URL=wss://your-project.livekit.cloud
LIVEKIT_API_KEY=your-livekit-api-key
LIVEKIT_API_SECRET=your-livekit-api-secret

# Optional: voice-model providers
OPENAI_API_KEY=your-openai-api-key
DEEPGRAM_API_KEY=your-deepgram-api-key
CARTESIA_API_KEY=your-cartesia-api-key
ELEVENLABS_API_KEY=your-elevenlabs-api-key
You do not need every provider key on day one. Add only the providers your
chosen voice pipeline uses. The most important local prerequisite is simply
having the lk CLI installed and available on your PATH, because the
repository deploy script shells out to it directly.
Local LiveKit is useful when you want to test the room transport yourself
or develop without relying on a cloud project. It is separate from the
repository's own docker-compose.yml, which only starts Postgres.
Install the LiveKit server locally:
brew update && brew install livekitStart the server in dev mode:
livekit-server --devPoint your env file at the local instance. The local dev server uses the
default devkey and secret credentials:
LIVEKIT_URL=ws://127.0.0.1:7880
LIVEKIT_API_KEY=devkey
LIVEKIT_API_SECRET=secret
If you want to connect from another device (e.g. mobile phone) on your network, use
livekit-server --dev --bind 0.0.0.0 and replace 127.0.0.1 with your
machine's LAN IP in the client-facing URL.
All setup pre-built
The starter already includes Docker-based build assets for the agent itself, but it does not currently spin up a LiveKit server through Docker Compose for you. Treat LiveKit transport as a separate dependency from Postgres and the rest of the local services.
Run the agent locally
Once your environment variables are in place, local development is straightforward. The easiest path is to let Turbo orchestrate the voice package task graph for you, because packages/ai/voice/turbo.json already declares dev -> download-files -> build.
Recommended approach
From the ai repository root, you can run the voice worker through Turbo and
let it handle the build and pre-download steps automatically:
pnpm with-env turbo dev --filter=@workspace/ai-voiceThis is the best command to document for day-to-day development. The step-by-step commands below are still useful when you want to understand what happens under the hood or run each piece manually.
If you are already working in the full monorepo, pnpm dev from the repository root is also a valid path. The root script runs pnpm with-env turbo dev, so the voice package can be started as part of the wider development graph alongside the web and mobile apps.
Install dependencies for the monorepo:
pnpm installBuild the package first if you want to run the pieces manually:
pnpm --filter @workspace/ai-voice buildThis runs TypeScript compilation for @workspace/ai-voice and produces the
dist output used by the worker's production-style scripts.
Optionally pre-download local files such as VAD-related assets:
pnpm --filter @workspace/ai-voice download-filesThis boots the built agent in a special download mode so it can fetch any local runtime assets it needs ahead of time. In practice, this is where model helpers such as Silero VAD assets can be warmed up before you enter a live session.
Run the agent in development mode:
pnpm --filter @workspace/ai-voice devThis loads apps/web/.env.local, starts the LiveKit agent entrypoint in
development mode, prewarms the VAD, and waits for room jobs from your
local or cloud LiveKit project.
In a separate terminal, run the app itself:
pnpm devThis starts the rest of the product surface so you can actually join the room from the web app, mobile app, or any other connected client.
The package also includes pnpm --filter @workspace/ai-voice connect and pnpm --filter @workspace/ai-voice start for alternative LiveKit agent startup modes. If you prefer the Turbo task graph for those flows too, start is also wired to depend on download-files in packages/ai/voice/turbo.json. For the bigger picture on these modes, see LiveKit's voice quickstart.
Dashboard and playground
LiveKit Cloud gives you two especially useful surfaces while building. The dashboard is your operational control plane, and the playground is your fastest browser-based testing surface when you do not want to open the full app.
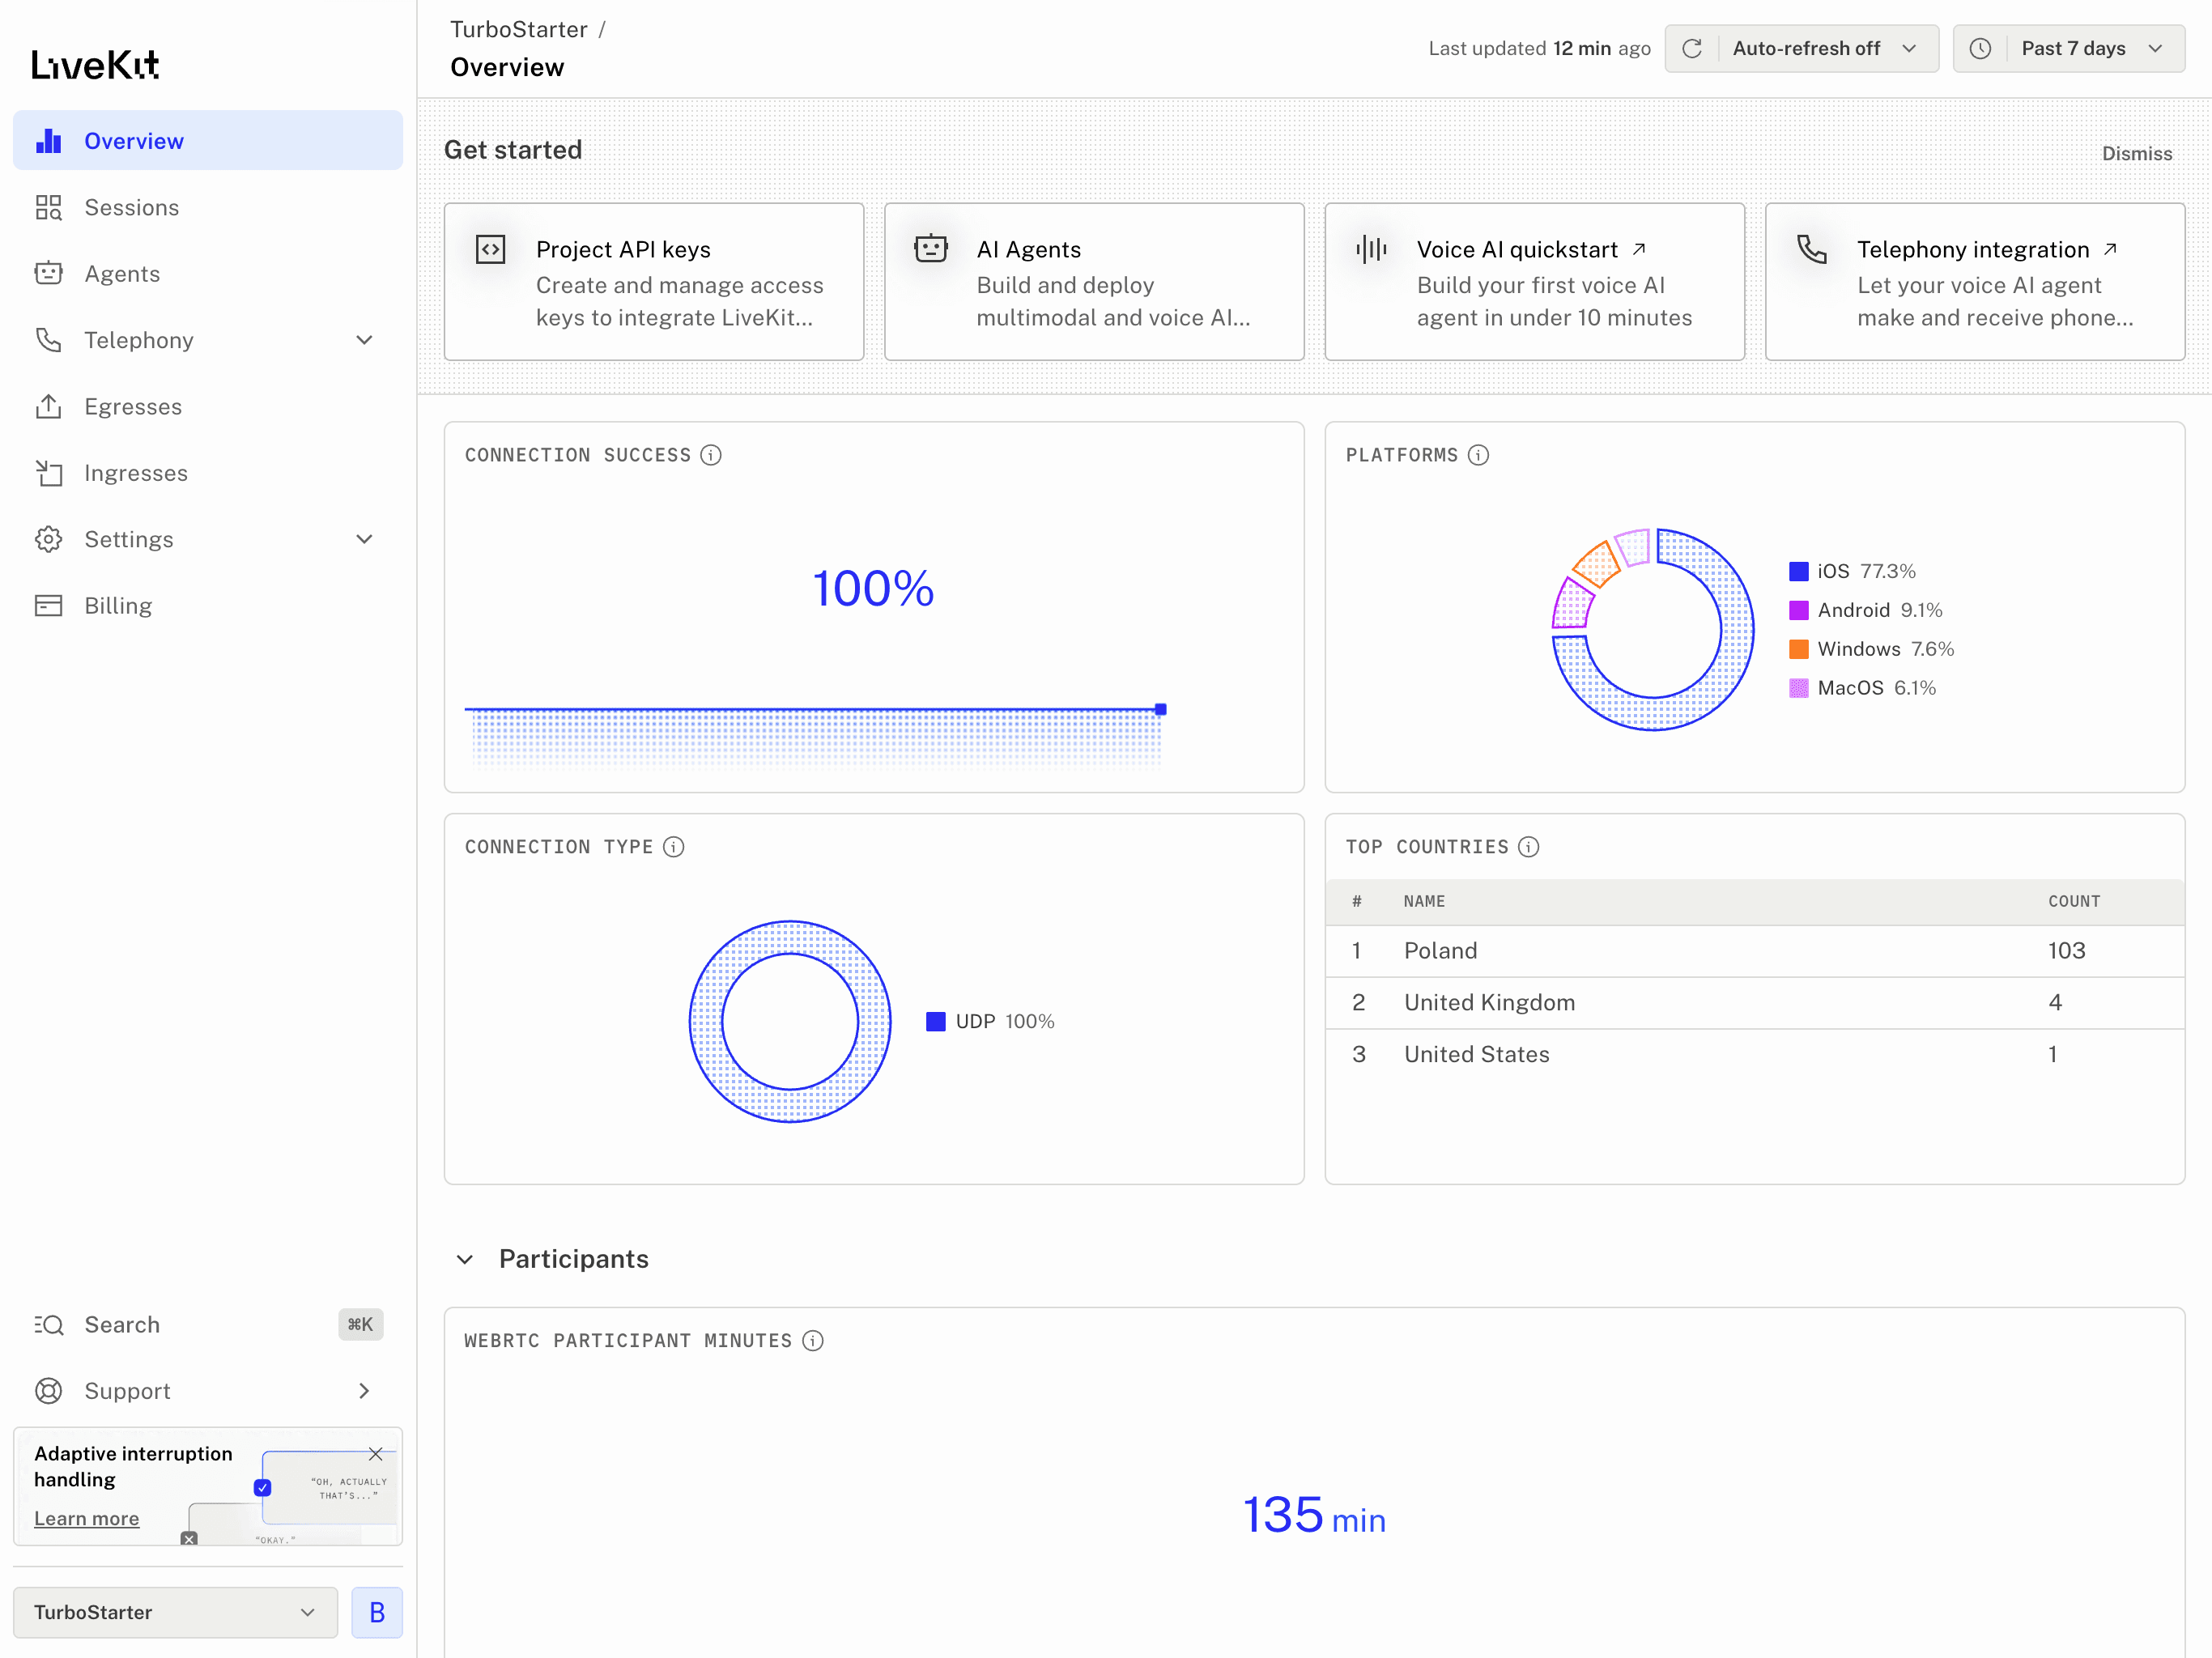
Dashboard
The LiveKit Cloud dashboard is where you create projects, manage API keys, inspect agent deployments, and review operational signals after deployment.
Project and key management
Create projects, generate credentials, and manage the values that end up in your local env files or cloud secrets.
Deployments and health
Review deployment status, session counts, errors, limits, and other agent health signals from one place.
Logs and debugging
Use the dashboard's runtime and build logs when a deployment starts failing, cold starts become visible, or a model provider is misconfigured.
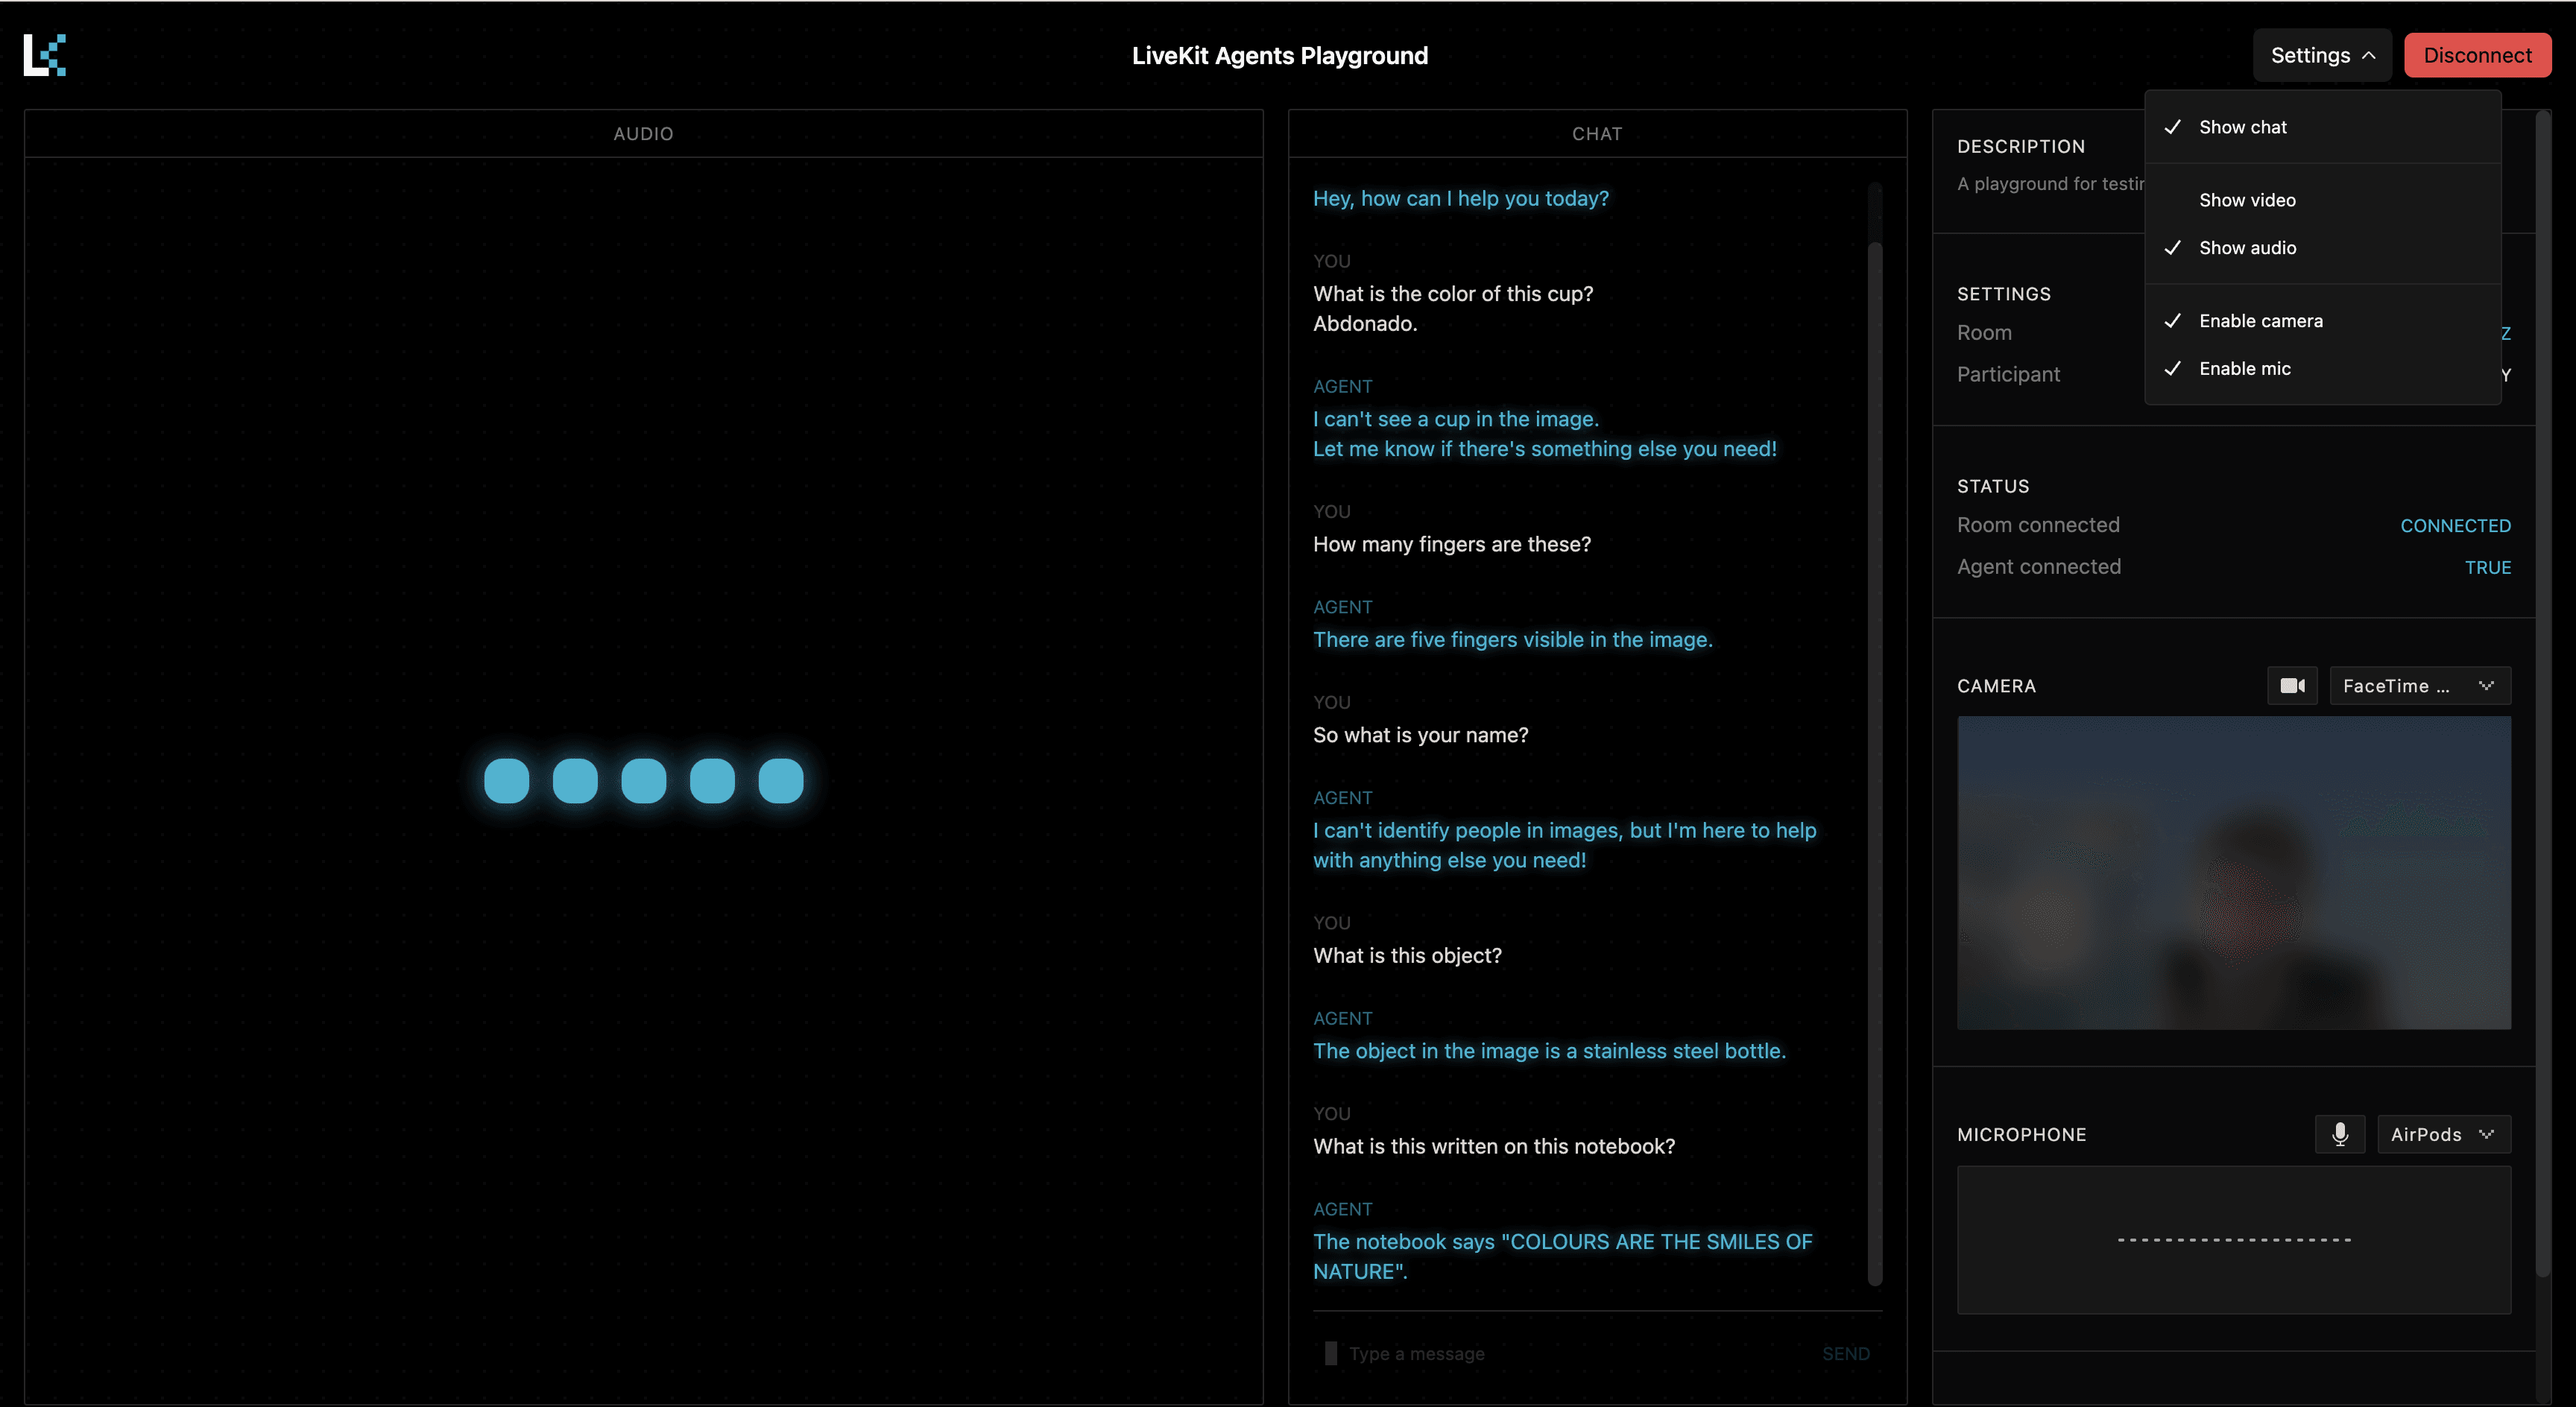
Playground
The Agents Playground is useful when you want to verify the agent itself before you involve the full product UI. It is especially handy while tuning prompts, testing interruptions, or validating a new STT/TTS provider combination.
You can use the playground against a locally running agent in dev mode or a deployed agent in LiveKit Cloud. LiveKit covers this flow in the Voice AI quickstart.
Deployment
The repository already contains the agent build and staging flow, so deployment is less about writing Docker logic and more about understanding what the existing scripts are doing for you.
deploy command
The main entrypoint is the package-level deploy script in packages/ai/voice/package.json. It stages a deployment workspace and then hands that staged directory off to the LiveKit CLI.
pnpm --filter @workspace/ai-voice run deployWhat the staging script does
The file packages/ai/voice/src/deployment/stage-agent-deploy.ts prepares a clean .lk-stage-ai-voice workspace at the repo root. That staging step keeps the agent deployment isolated from the rest of the monorepo while still letting the Docker build reuse workspace packages.
It copies:
- the root
package.json pnpm-lock.yamlandpnpm-workspace.yaml- the
packagesandtoolingdirectories - the agent-specific deployment
Dockerfile
How the container build works
The Dockerfile in packages/ai/voice/src/deployment/Dockerfile is already set up for the agent. It installs dependencies for @workspace/ai-voice, builds the package, pre-downloads model files, and then starts the built worker with the production start script.
That means the important work has already been encoded into the repository:
- dependency installation is workspace-aware
- the build only targets
@workspace/ai-voice download-filesruns during image build- the final container boots directly into the LiveKit agent worker
How LiveKit Cloud sees the deployment
After staging, the script runs lk agent deploy against .lk-stage-ai-voice. LiveKit Cloud then builds the image, stores deployment metadata, and exposes the resulting agent through the dashboard and playground surfaces.
If you are using a cloud deployment, keep provider credentials such as OPENAI_API_KEY, DEEPGRAM_API_KEY, CARTESIA_API_KEY, or ELEVENLABS_API_KEY in LiveKit Cloud secrets instead of baking them into the image. LiveKit documents this flow in its deployment overview.
LiveKit project metadata
The staged workspace also contains a livekit.toml file once the CLI has linked that deployment to a specific LiveKit project and agent. Think of it as deployment metadata owned by the LiveKit toolchain rather than application code you should hand-edit frequently.
Structure
The voice feature spans the shared agent package, the API layer, and the two frontends. Keeping these boundaries clear makes it much easier to change models or deployment strategy without rebuilding the UI from scratch.
Core
The shared voice backend logic lives in packages/ai/voice/src. This is where token generation, environment handling, agent instructions, the agent entrypoint, and deployment assets live.
API
The voice route wiring lives in packages/api/src/modules/ai/voice.ts. It sits inside the same Hono request pipeline as the other AI apps, so voice still benefits from shared auth, validation, and credit logic before the request reaches the LiveKit-specific code.
Web
The web route entrypoints live in apps/web/src/app/[locale]/(apps)/voice/**, while the actual feature implementation lives in apps/web/src/modules/voice/**. That module tree contains the welcome screen, controls, transcript, session provider, settings, and visualizer components.
Mobile
The mobile route entrypoints live in apps/mobile/src/app/(apps)/voice/**, while the feature logic lives in apps/mobile/src/modules/voice/**. That is where the mobile session provider, controls, transcript, video tile, chat composer, and animations are defined.
Related documentation
Voice sits at the intersection of speech, transcription, provider choice, and realtime product design. These pages are the best next stop if you want to go deeper into one part of the stack.
Speech
Learn how to think about TTS quality, latency, and voice UX more broadly.
Transcription
Understand the STT side of voice products, including accuracy and streaming tradeoffs.
ElevenLabs
Explore a speech-first provider that can plug into a LiveKit pipeline.
OpenAI
See where realtime and LLM layers fit when you use OpenAI models in voice products.
References
These are the best official LiveKit references to keep open while working on the voice app:
How is this guide?
Last updated on